Have you ever ran a PowerShell script that didn’t do what it should? Or you made an update and now it doesn’t work? Sounds like you need to use PowerShell’s testing solution called Pester!
Pester is a framework designed for validating and testing your PowerShell code, whether in functions, cmdlets, modules, or scripts. You write tests to make sure your PowerShell code does what it is supposed to, or use it to validate changes made to an existing script.
In this post, you’ll learn how to install Pester and get started writing your very first Pester tests! This tutorial is uses Pester version 5, which was recently released, and PowerShell 7.0.1.
Installing PowerShell Pester Module
First, you need to install the PowerShell Pester module on your system. Pester is available for download from the PowerShell Gallery.
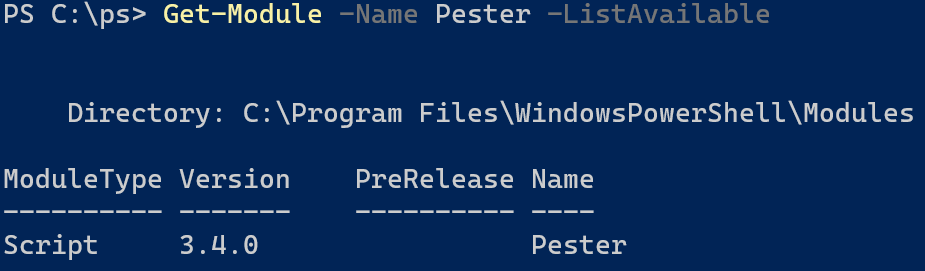
However, Pester version 3.4.0 is installed as a part of Windows 10 and Windows Server 2016, and installing a newer version alongside this one causes some conflicts and updates issues later on. You can see this for yourself if you search for the Pester module:
Get-Module -Name Pester -ListAvailable
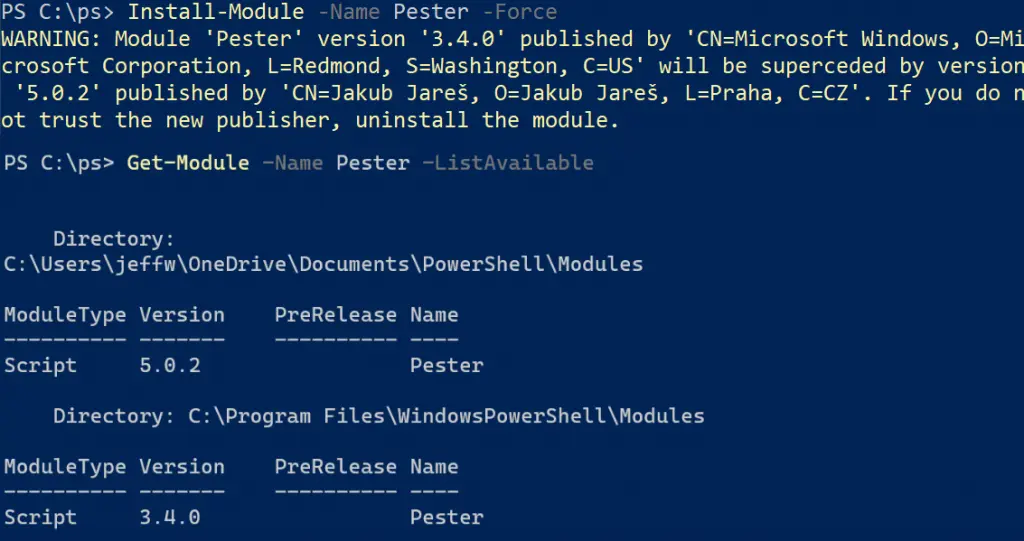
You can perform a side-by-side installation of Pester by running the following commmand as an administrator to get the latest version:
Install-Module -Name Pester -Force
You may get a message warning that the 3.4.0 version published by Microsoft will be superseded by this latest version being installed. This error occurs because the newer module is signed with a different certificate than the version that came with Windows.
Creating the Pester Test File
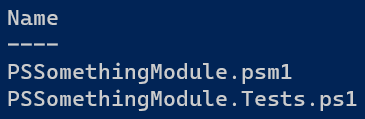
Pester tests are defined in a separate .ps1 file and typically stored in the same folder as the script or module being tested. The test script file name must end with .Tests.ps1 in order for Pester to automatically discover and execute the test script file.
Here is a module named PSSomethingModule.psm1 that is going to contain several functions. Therefore, the Pester test file for this module will have the same name as the module appended by .Tests.ps1:
Exploring the Module Code
This module includes a single function named Get-Something. The function has a single optional parameter named ThingToGet. If the parameter is specified, it will output "I got" followed by the value of the parameter; otherwise, it will output "I got something!".
function Get-Something {
    [CmdletBinding()]
    param (
        [Parameter()]
        [string]
        $ThingToGet
    )
    if ($PSBoundParameters.ContainsKey('ThingToGet')) {
        Write-Output "I got $ThingToGet!"
    }
    else {
        Write-Output "I got something!"
    }
}
Writing a Pester Test
With Pester installed and module code available, it’s time to write your first Pester test. Open up the PSSomethingModule.Tests.ps1 in your favorite editor and we’ll explore how tests are organized.
Pester tests are organized into blocks. There are six types of blocks we can use, and this article focuses on three:
- Describe
- Context
- It
Describe, Context, and It Blocks
Describe blocks are the highest level of organization in the Pester test file. The Describe block contains a logical grouping of tests, and anything defined in that Describe block will no longer exist when it exits.
Next are Context and It blocks. A Describe block can contain any number of Context and It blocks scoped to it. Context blocks are optional and just provide an additional group of It blocks within the Describe block. It blocks are the actual test and can be located under Describe or Context blocks. The It block is the actual test that you want to perform against the code.
Just like describe, each block has its own scope. A variable or other information defined in a Describe block will be available to any nested Context or It blocks. However, information defined in an It block will not be available to the parent Context or Describe blocks. This is very much like variable scoping in regular PowerShell code when dealing with if-then statements or loops.
Take a look at a Describe block with Context and It blocks for testing the Get-Something function:
Describe "Get-Something" {
    Context "when parameter ThingToGet is not used" {
        It "should return 'I got something!'" {
            # Assertion
        }
    }
    Context "when parameter ThingToGet is used" {
        It "should return 'I got ' follow by a string" {
            # Assertion
        }
    }
}
Here we have a single Describe block for the Get-Something function, and within that block are two Context blocks. Each Context block covers if we use a parameter or not when calling the function.
Finally, within each Context block is the It block describing the test and the expected result. If the ThingToGet parameter is not used, then the output should be "I got something!". If the ThingToGet is used, then the output changes to reflect the string passed to the parameter.
Now that the Pester test file is organized, how do you actually write the tests?
Writing Assertions
Next, you need to write the code that will replace our # Assertion comment in the code above. Assertions are defining what you expect to happen (and this should be reflected in the name of the It block). For the purposes of this article, you are going to focus on the Should keyword.
If you call the function Get-Something without any parameters, the output should be "I got something!". If I call the function while using the ThingToGet parameter, then the output should change the message to include this parameter value.
There are many Should operators, but again, for simplicity, start with the Be operator. The assertion is going to call our function and then define what the output should be.
Start when not using a parameter. The assertion will look like this:
Get-Something | Should -Be 'I got something!'
When a parameter is used, you call the function with the parameter and value and change what you expect it should be. The assertion can be multiple lines, and you can use variables just like you do in a script.
$thing = 'a dog'
Get-Something -ThingToGet $thing | Should -Be "I got $thing!"
Here are the assertions in the full context of the Get-Something Describe block:
Describe "Get-Something" {
    Context "when parameter ThingToGet is not used" {
        It "should return 'I got something!'" {
            Get-Something | Should -Be 'I got something!'
        }
    }
    Context "when parameter ThingToGet is used" {
        It "should return 'I got ' follow by a string" {
            $thing = 'a dog'
            Get-Something -ThingToGet $thing | Should -Be "I got $thing!"
        }
    }
}
Running PowerShell Pester Tests
Let’s recap: you have a PowerShell module with a function, and you have a Pester test file a Describe block for testing a function in the module. You have two Context blocks covering if the parameter is used or not. Within each Context block is an It block with an assertion or test to perform against the code. Now how do you run the Pester tests?
Out in PowerShell, change the current location to the folder where the module and test files are saved. You can then start Pester testing by running the command Invoke-Pester. If you run the invoke command without any parameters, it will run tests in any *.Tests.ps1 file it can find.
If you want to specify a single test file, use the Path parameter and give the path to the test file. Since you just have one test file, run Invoke-Pester without any parameters.
So give it a try! What happened? Maybe something like this happened to you (it did to me):
Invoke-Pester
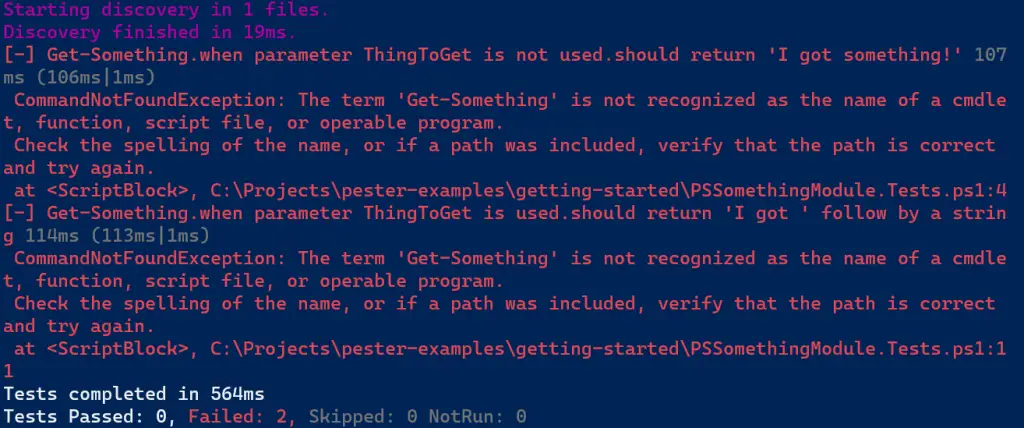
Looking through the error, the part that sticks out the most is CommandNotFoundException. The Pester test file doesn’t know about the functions inside the module, which makes sense. If the module hasn’t been imported into the current PowerShell session, then it doesn’t know those commands exist. And within the test file, you are actually calling the commands and functions to verify if they work or not.
This means you need to import the module prior to running the tests so Pester knows they exist and can use them. Before the Describe block, go ahead and add this command so we can import the PSSomethingModule.psm1 file that is in the same directory as our test file:
Import-Module .\PSSomethingModule.psm1 -Force
After adding this to the top of the test file before the Describe block, invoke the Pester tests again:

The results show it discovered 1 file and had 2 tests pass with zero failed, skipped, or not run. However, this output seems to be a change from previous versions of Pester. The output used to be a bit more verbose and would show the individual assertions being ran. In order to show more detail, add the -Output parameter with a value of "Detailed":
Invoke-Pester -Output Detailed
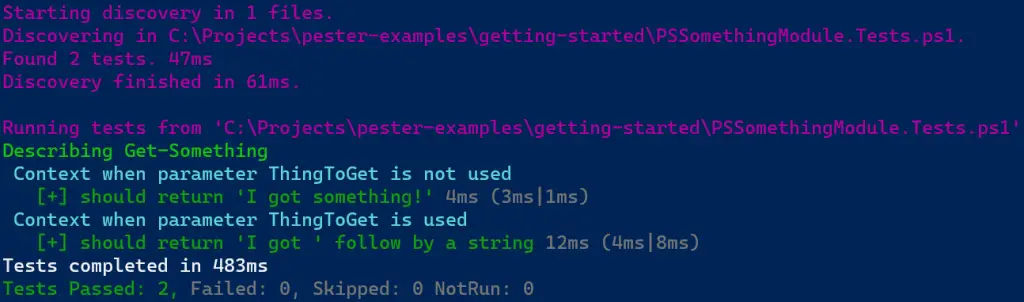
Now you can see the results match what you wrote in the test file. At the top level, you have the Describe block for the function, then the Context and It blocks with the assertions. Hopefully seeing the output this way shows why you need to name the different blocks with exactly what they do. When viewing the detailed output, we can see exactly which tests pass and which ones fails.
Verifying Code Changes
So how can Pester testing help verify any mistakes in your code? Go back and change the Get-Something function to always output "I got something!" even if the ThingToGet parameter is used. This would show a logic error in the function that Pester can verify. Here’s the incorrect function:
function Get-Something {
    [CmdletBinding()]
    param (
        [Parameter()]
        [string]
        $ThingToGet
    )
    if ($PSBoundParameters.ContainsKey('ThingToGet')) {
        Write-Output "I got something!"  # This will make the Pester test fail
    }
    else {
        Write-Output "I got something!"
    }
}
Run Invoke-Pester -Output Detailed again and see where the tests can catch this error:
Invoke-Pester -Output Detailed
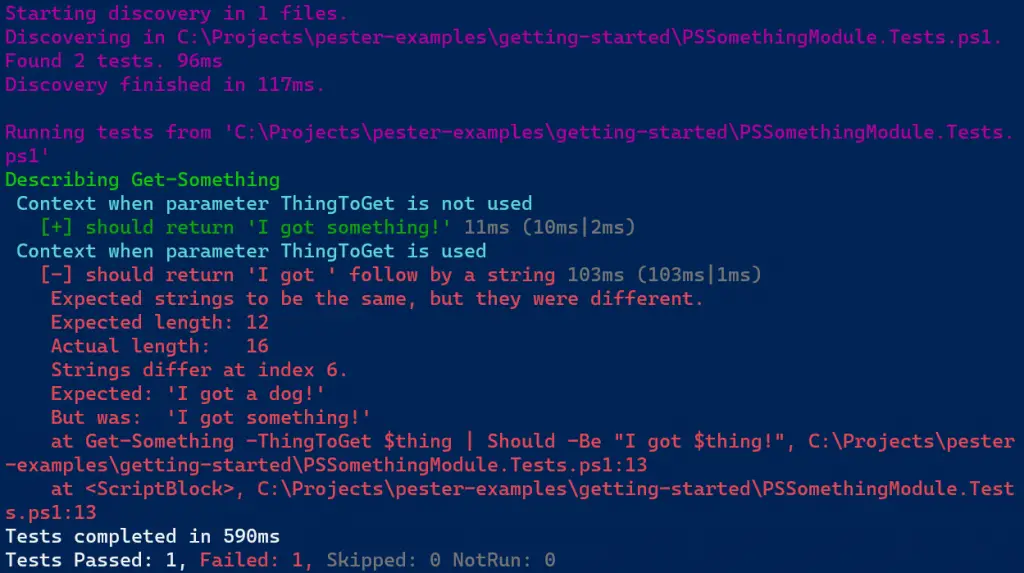
The red text will show immediately what happened. In the Context of when the ThingToGet parameter is used, you expected "I got a dog!" but "I got something!" was displayed. You can go back and verify the function to see the function didn’t use the parameter variable in the output.
Add one more test to each Context block. In addition to verifying the output string text, you can verify that the output type itself is a string and not another data type. Here an additional assertion you can add using the Should keyword and the BeOfType operator:
It "should be a string" {
        Get-Something | Should -BeOfType System.String
    }
Notice you can have multiple It assertions inside the same Context block. Here’s the full contents of your first Pester test file:
Feel free to download this example module and test script from my GitHub repository to try it yourself:
JeffBrownTech / pester-examples / 01-getting-started
Summary
PowerShell Pester is a great framework for performing code analysis and testing. If you are serious about writing production-level code, being able to test and verify is a must.
Additional Reading:
Pester Docs: Quick Start
Pester Docs: Describe
Pester Docs: Context
Pester Docs: It
Pester Docs: Should
Enjoyed this article? Check out more of my PowerShell articles!