If you’ve written a module or script that you feel others could benefit from using, definitely consider publishing it to the broader community. This post is about how to publish your first PowerShell module to the gallery.
If you’d rather watch a video demonstration, check out Publishing Your 1st Package to the PS Gallery.
Prerequisites
To publish to the PowerShell Gallery, head over to https://www.powershellgallery.com and create an account. PowerShell Gallery accounts use a Microsoft account, such as one tied to Azure Active Directory or a Microsoft ID, like an email account from outlook.com or hotmail.com.
Next, generate an API key that allows you to publish packages to your account. API keys can be scoped to specific packages and have different privileges, such as pushing new items and versions or only pushing new versions. These API Keys also have expiration dates.
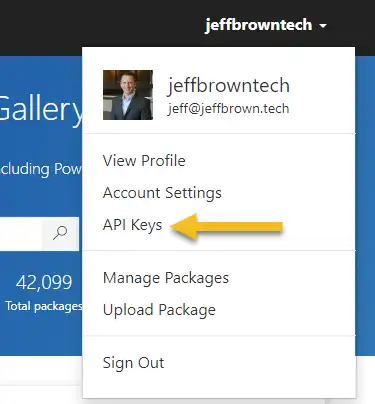
Select your username in the upper right to generate a key and choose API Keys.
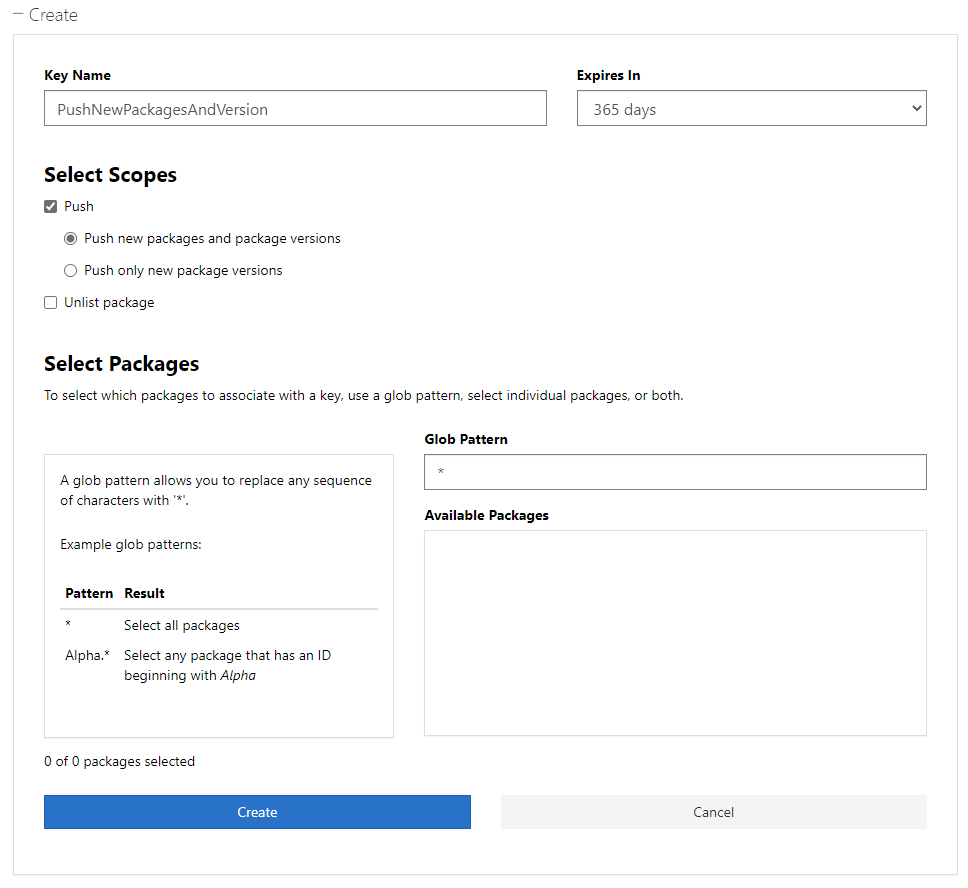
Next, on the API Keys page, select the plus sign to Create, and the new API key form will appear. From here, fill out the required information. In this example, the key will have permission to push new packages and versions for any package associated with your account.
- Key Name: PushNewPackagesAndVersions
- Expires in: 365 days
- Select Scopes: Push new packages and package versions
- Glob Pattern: * (wildcard)
The Glob Pattern allows you to scope the package names to which the API Key applies. Once you have configured the options, click Create.
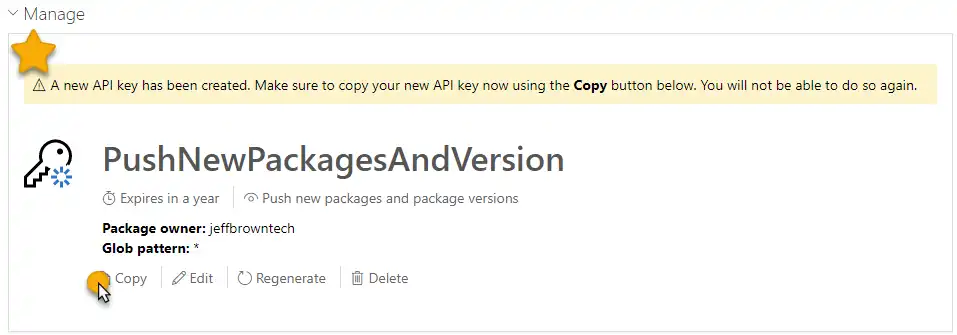
Once the API Key is generated, the next part is crucial:
Copy the API Key value as this is the only opportunity to do so!
If you navigate off this page, you will not be able to access this value again. Select the Copy option and save the API Key to a safe place like a key vault or password manager.
The final prerequisite, of course, is you need something to publish! This example uses a module that uses Twilio’s API to send SMS messages, view sent SMS history, and verify phone numbers. You can view the project here on GitHub:
https://github.com/JeffBrownTech/twilio-powershell-module
Enough with these prerequisites, let’s move on to the remaining items!
Generating a Module Manifest
You must make a module manifest file before publishing a module to the gallery. If you’ve downloaded other modules, you might have seen these before; they end in a .psd1 file extension. This manifest aims to include additional information about the module, such as the author, other dependent modules, define system requirements, and what members to export from the module. The manifest file itself is a table of key:value pairs. The manifest and module files must have the same name as the module, and you place them together in the module’s root directory.
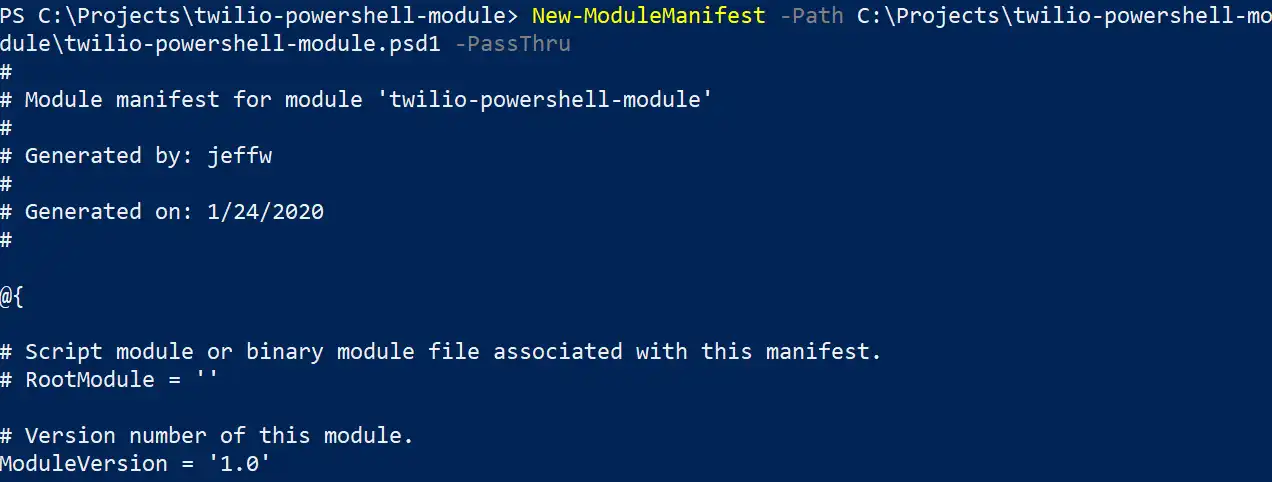
You can generate a module manifest file using the PowerShell cmdlet New-ModuleManifest. The minimum parameters needed for the cmdlet are Path to create the .psd1 file and PassThru to send the output to the pipeline and to the file.
New-ModuleManifest `
    -Path C:\Projects\twilio-powershell-module\twilio-powershell-module.psd1 `
    -PassThru
Microsoft documents some recommendations on manifest elements that are important to fill out before publishing to the gallery. These items include:
- Script or Module Name: this comes from the name of the .ps1 script or the .psd1 for a module.
- Version: this required field follows the SemVer guidelines of three numerical blocks separated by periods (e.g., 1.0.12).
– The first number represents major or breaking changes between versions
– The second number represents feature-level changes (new cmdlets)
– The third number represents non-breaking changes (new parameters, updated samples).
- Author: This is a required field
- Description: This is a required field
- Project URI: You should include a link to a GitHub repo or similar location that describes the project.
- Tags: It is strongly recommended that packages be tagged based on compatibility with PSEditions and platforms.
Check out the full manifest in the GitHub repository:
Next, test the manifest and make sure everything is ready to go using the Test-ModuleManifest cmdlet. Use Path parameter to point it to the .psd1 file and make sure no errors occur.

Following Best Practices with PSScriptAnalyzer
The next step is to perform some code analysis using PSScriptAnalyzer. This module can be downloaded from the gallery using the command Install-Module -Name PSScriptAnalyzer.
Use the Invoke-ScriptAnalyzer cmdlet and point it to the module to run the analysis like this:
Invoke-ScriptAnalyzer -Path C:\Projects\twilio-powershell-module\twilio-powershell-module.psm1
Adding a License
Add a license file to the project folder using the example found on the MIT License on Wikipedia.
Completing the Publish to the PowerShell Gallery
Finally, publish the module to the PowerShell Gallery using the Publish-Module cmdlet. Microsoft’s documentation recommends running this using -WhatIf and -Verbose to identify and remediate any issues before attempting to publish for real.
First, save your PowerShell API key to a variable named $apiKey. Next, run the Publish-Module cmdlet pointing to the folder containing the module and manifest and specify the API key variable.
Publish-Module `
    -Path "C:\Projects\twilio-powershell-module\" `
    -NuGetApiKey $apiKey `
    -WhatIf `
    -Verbose
And the result!

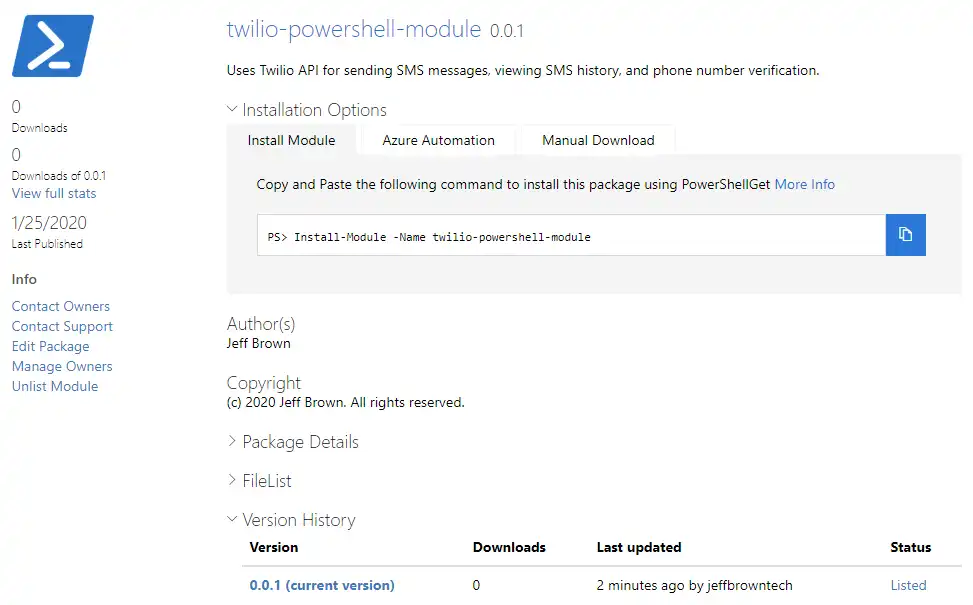
And it’s good! After waiting a few minutes, refresh your PowerShell Gallery account page to view your published module.

Also, navigate out to the public page to view where it pulls information from the manifest regarding the version number, copyright, author, and license information:
Closing
Publishing to the PowerShell Gallery enables you to share your custom tools with others in the community. Your module and development skills can help someone else!
References:
Microsoft Docs: Creating and Publishing Packages
Microsoft Docs: PowerShellGallery Publishing Guidelines and Best Practices
Check out more PowerShell content here!