Azure Automation accounts have traditionally used Run As accounts to authenticate to other Azure services. However, Microsoft is deprecating Azure Automation Run As accounts in favor of using a managed identity.
In this tutorial, you will learn what exactly is a managed identity, how to authenticate to Azure using the managed identity in a PowerShell runbook, and how to migrate existing runbooks using Run As accounts to managed identities.
Prerequisites
Before you begin this tutorial, you will need the following:
- Azure tenant and subscription
- Administrator account with sufficient privileges on a subscription, such as Owner or Contributor
- PowerShell knowledge
Want to learn more about Azure Automation and writing PowerShell runbooks? Check out these other articles by Jeff Brown!
Azure Automation: Creating a PowerShell Runbook
Azure Automation Hybrid Worker Groups: Getting Started Guide
What is a managed identity?
Azure resources sometimes need to access or communicate with other Azure resources. For example, a Logic App may need to access a secret stored in a Key Vault. For the Logic App to access the Key Vault, the Logic App requires permission to the Key Vault, and the Logic App needs to authenticate to verify authorization to the Key Vault.
A common issue with authentication is maintaining secrets, credentials, certificates, or other keys to secure communication between resources. These methods often have expiration dates, leading to authentication failures and services stopping working. Managed identities provide a solution for simple authentication and remove the need to manage credentials.
A managed identity is an identity assigned to an Azure resource. Managed identities can obtain Azure AD tokens for authorization without the need to manage credentials. Azure automatically rotates the credentials, and no one, including Global Administrators, has access to the credentials. A resource with a managed identity can access any service supporting Azure AD authentication.
There are two managed identity types: system-assigned and user-assigned.
System-assigned
System-assigned managed identities are associated with a single Azure resource. For example, if you enable ten virtual machines with managed identities, you will have ten separate identities associated with the specific virtual machine. System-assigned managed identities have a one-to-one relationship with their corresponding Azure resource.
Because of this one-to-one relationship, the system-assigned managed identity is tied to the resource lifecycle. If you delete the virtual machine, the corresponding system identity is also deleted. By associating the resource and identity, you eliminate the risk of orphaned service accounts.
User-assigned
User-assigned managed identities are the opposite of system-assigned. The user-assigned identity is not tied to the resource lifecycle. If you delete the resource, the user-assigned identity is not automatically deleted. You can assign a user-assigned identity to multiple resources so the identity does not have a one-to-one relationship with the resource.
You create the identity first, then assign it to resources later. You use a user-assigned identity if you want to use just a single account to access a resource, then enable that account as a managed identity on multiple resources.
For example, you can create an account and assign access to a storage account. You then associate the account as a user-assigned managed identity to multiple resources needing access to the storage account, like a virtual machine or Azure function app. This setup prevents creating multiple permissions assignments for each resource like you would with a system-assigned managed identity.
Enabling Azure Automation managed identity
This tutorial focuses on enabling system-assigned managed identities. The following sections showcase three different ways to enable a system-assigned managed identity.
Azure portal
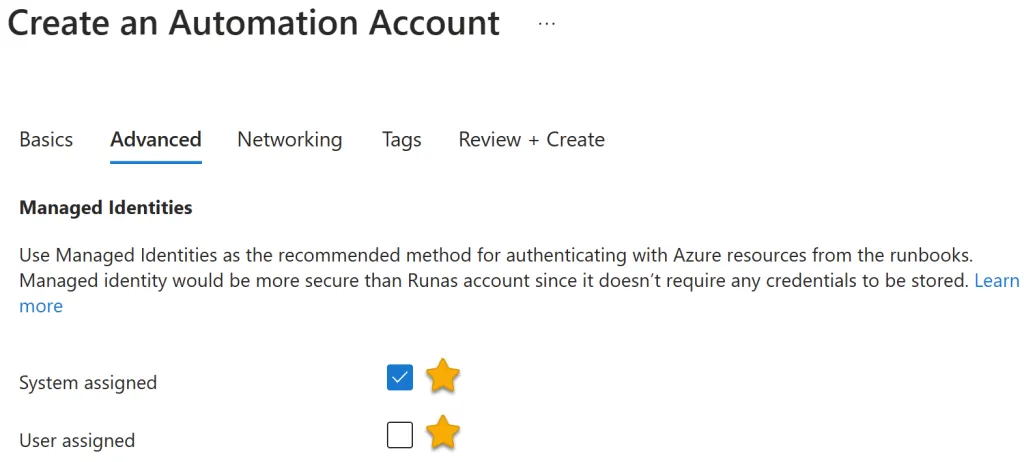
You can enable a managed identity when creating a new Automation account. On the Advanced tab, select either System assigned or User assigned managed identity.
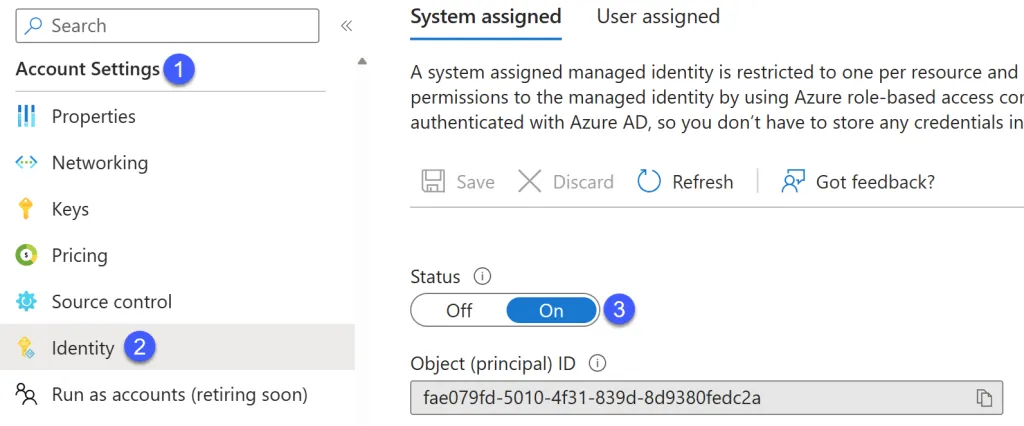
If you have an existing Automation account, navigate to Account Settings > Identity. Here you can enable the system or user-assigned identity. The screenshot below shows enabling the system-assigned identity.
Note the object or principal ID that Azure generates for the managed identity. This ID is exactly like the ID for a regular user account.
PowerShell
The New-AzAutomationAccount cmdlet does not have the capability to create a managed identity. However, you can enable the managed identity after creating the account using the Set-AzAutomationAccount cmdlet. With this cmdlet, specify the Automation account Name, and the ResourceGroupName, and use the AssignSystemIdentity switch parameter to enable the system-assigned managed identity.
Save the cmdlet’s output to a variable named $output. You can then view the managed identity information by accessing the Identity property and piping the output to Format-List.
$output = Set-AzAutomationAccount `
    -Name "jbtautomationdemo" `
    -ResourceGroupName "automationdemo-rg" `
    -AssignSystemIdentity
$output.Identity | Format-List
The output should look similar to the following screenshot. The PrincipalId is the unique identifier for the managed identity.

Bicep Template
Bicep is Microsoft’s newest infrastructure as code (Iac) solution. When creating an Azure Automation account, you can enable a managed identity. The sample Bicep template below demonstrates enabling a system-assigned managed identity. Use the identity block with a type of SystemAssigned to enable the managed identity.
resource aademo 'Microsoft.Automation/automationAccounts@2022-08-08' = {
  name: 'jbtautomationdemo2'
  location: 'westus2'
  identity: {
    type: 'SystemAssigned'
  }
  properties: {
    sku: {
      name: 'Basic'
    }
  }
}
Read more about working with the Bicep language in these articles, also by Jeff Brown.
Azure Bicep: Getting started guide – 4sysops
Azure Bicep: Getting Started and How-To Guide (varonis.com)
Assign managed identity permissions
With the managed identity enabled, you can now assign permissions for the managed identity to other resources. The managed identity now appears just as any other user account in your Azure AD environment. You can search by the managed identity object ID or the name of the Automation Account. You can use any role-based access control (RBAC) to assign permissions on the resource to the managed identity.
For example, say a runbook needs access to a storage account. To assign permissions to the storage account for the managed identity:
- Navigate to the storage account, then Access Control (IAM).
- Click the + Add button, then select Add role assignment.
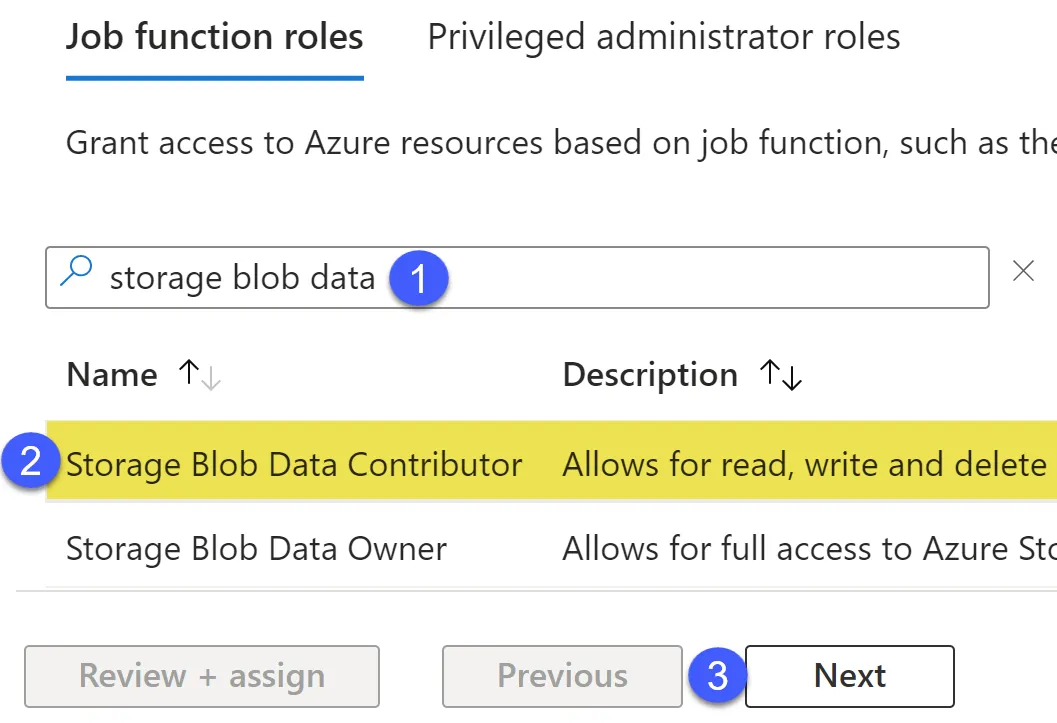
- In the Add role assignment window, on the Role tab, search and select the RBAC role from the list. This example shows selecting the Storage Blob Data Contributor role. With the chosen role, click Next.

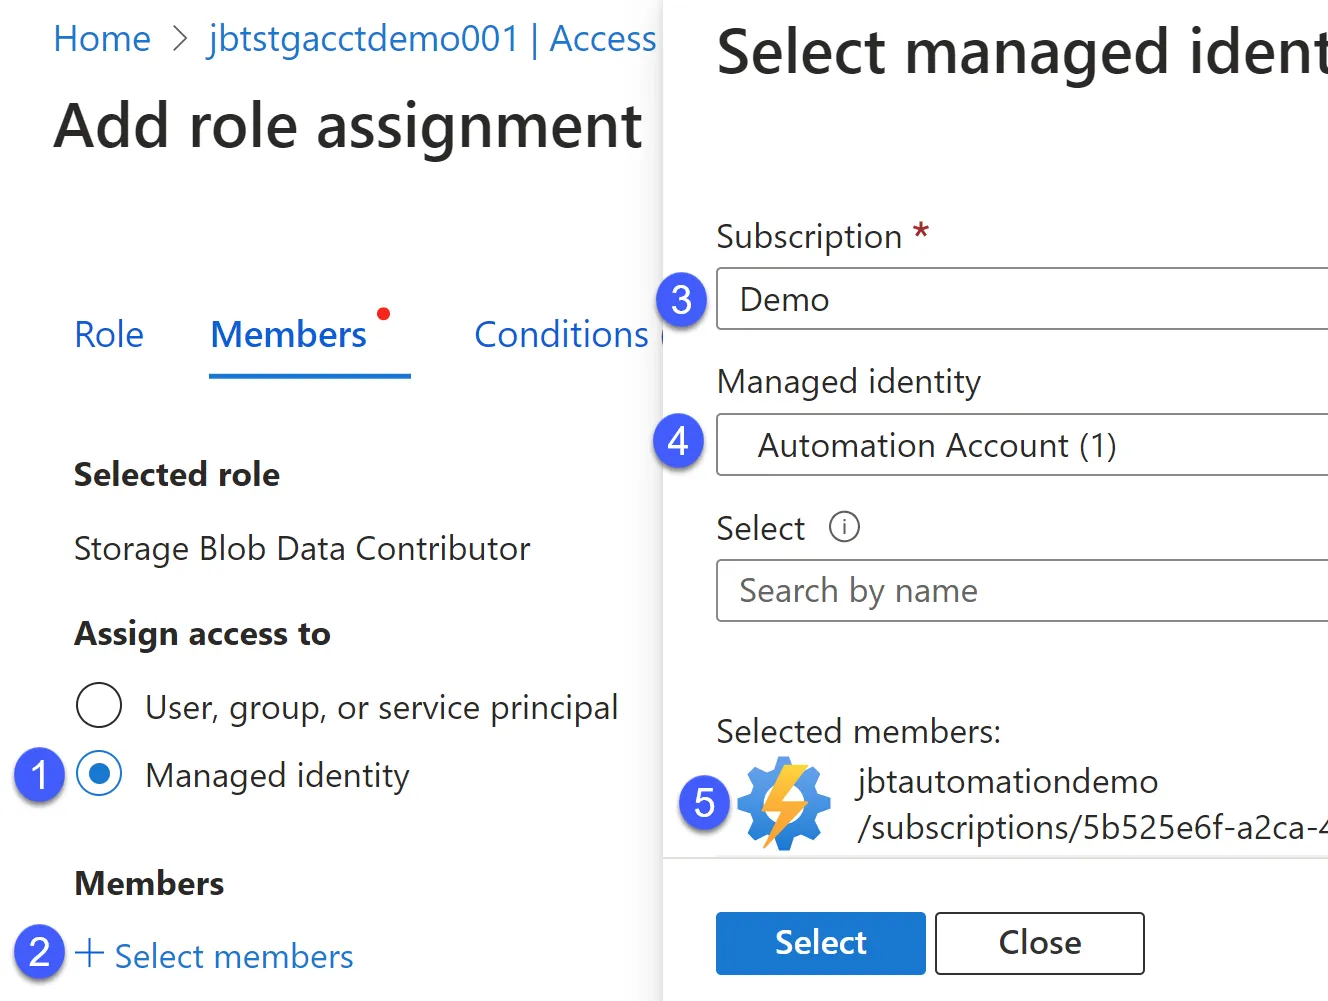
- On the Members tab, select the Managed identity radio button, then click + Select members.
- In the Select managed identities fly-out window, select the Subscription and Managed identity resource type. Then search or select the resource containing the managed identity. In this example, the resource is the jbtautomationdemo Automation Account.
- Finish the selection by clicking the Select button. Back on the Members tab, click Review + assign, then select Review + assign again.
- The Automation Account managed identity now appears with permissions to the resource.

Managed identity runbook authentication
Now that your Automation Account has a managed identity, it’s time to authenticate using the identity within a PowerShell runbook. Use the Connect-AzAccount cmdlet along with the -Identity switch parameter. This parameter informs the cmdlet to use the managed identity in the host environment. In this case, the host environment is Azure Automation.
# Connect using the managed identity
Connect-AzAccount -Identity
Run As accounts migration
Microsoft is deprecating Run As accounts on September 30, 2023. Before this date, you must update any runbooks using a Run As account to a managed identity.
To migrate from an existing Run As account to a managed identity in an Azure Automation account:
- Enable a system-assigned or user-assigned managed identity (or both).
- Assign the same privileges to the Azure resources for the managed identity matching the permissions for the Run As account.
- Update runbooks to authenticate using the managed identity.
Summary
Managed identities enable associating an identity with an Azure resource. You can then assign permissions to other resources for the managed identity. Managed identities are more straightforward to use than Run As accounts, as you don’t need to manage expiring permissions, certificates, secrets, or keys.
References:
Securing managed identities in Azure Active Directory – Microsoft Entra | Microsoft Learn
Migrate from an existing Run As account to Managed Identities | Microsoft Learn