Did you know Azure provides a browser-accessible shell for managing Azure resources? You can use both PowerShell and Bash commands directly in your browser using the Azure Cloud Shell!
In this tutorial, you will learn all about the Azure Cloud Shell, configuring the shell, and additional capabilities included in the shell.
To follow along with this tutorial, you will need an Azure subscription with sufficient permissions to manage resources, like Owner or Contributor.
What is Azure Cloud Shell?
Azure Cloud Shell is a browser-based shell command-line experience for managing Azure resources in your tenant. Cloud Shell supports both PowerShell for running Azure PowerShell module commands and Bash for running Azure CLI commands. Azure Cloud Shell automatically authenticates to your tenant using the current browser credentials, so there is no need to log in using separate commands.
Cloud Shell runs on Microsoft’s internally developed Linux distribution called Common Base Linux or CBL. Azure uses containers running this image to provision machines on a per-request basis, so the machine state does not persist across sessions. Cloud Shell is meant for interactive sessions, so it automatically times out after 20 minutes of inactivity.
Azure Cloud Shell also uses Azure Files found in Storage Accounts for persisting files across sessions. When you use the Cloud Shell for the first time, Azure prompts you to create or associate a new or existing file share for Cloud Shell to use.
Learn more about Azure Files in Azure Files: Introduction and Deployment Guide.
Configuring Azure Cloud Shell
Ready to set up Azure Cloud Shell? Follow the instructions below to get started!
Accessing Cloud Shell
There are three ways to access Cloud Shell:
- Direct link: Open your browser and navigate to https://shell.azure.com.
- Azure Portal: Select the Cloud Shell icon when accessing the Azure portal.
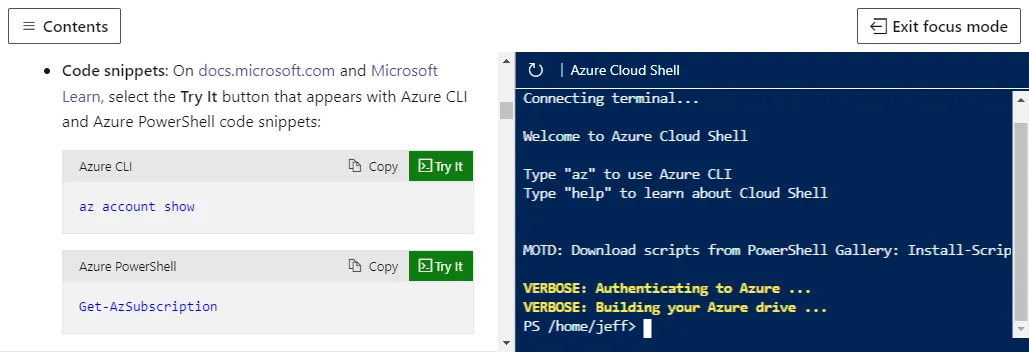
- Code examples: Microsoft Docs and Microsoft Learn often contain code examples. You can use the Try it button on these examples to open a Cloud Shell adjacent to the documentation. You can then run the command directly against your tenant.
If this is your first time accessing Cloud Shell, you must create a file share or associate an existing one. In this tutorial, you will create a new file share.
- Begin by accessing Cloud Shell using the direct link or Cloud Shell icon from the portal.
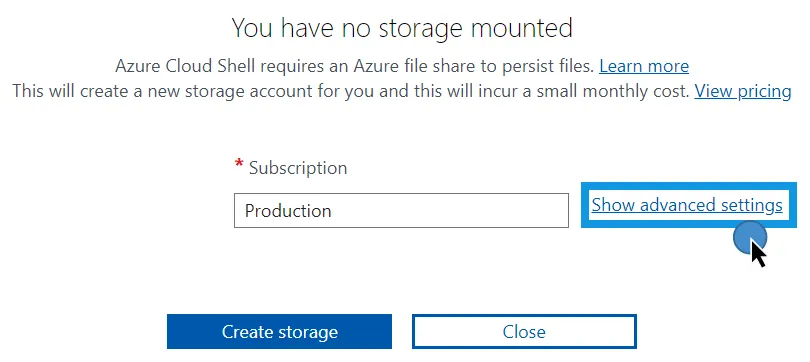
- Azure should recognize you do not have any storage mounted and prompt to create a new storage account. From here, you can select the subscription for Azure to automatically create the storage account, or select Show advanced settings in order to configure the properties yourself. Go ahead and select Show advanced settings.
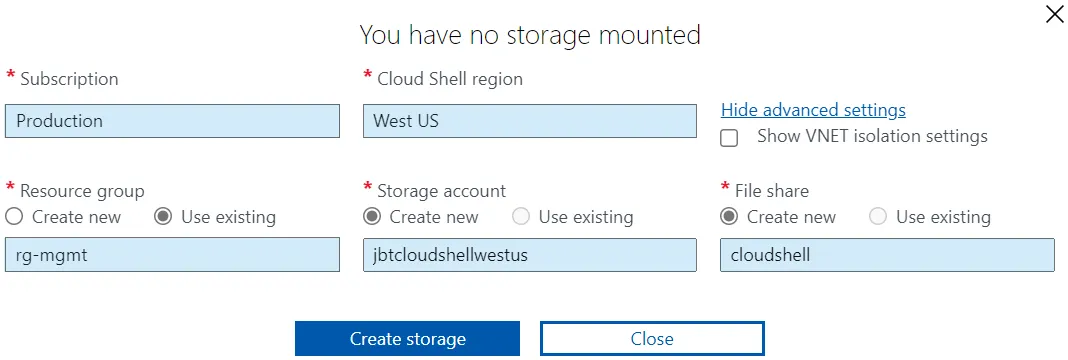
- Select the subscription to host the storage account as well as the Cloud Shell region. Next, select a new or existing resource group, storage account, and file share. Remember that storage account names need to be globally unique across Azure. Select Create storage to continue.
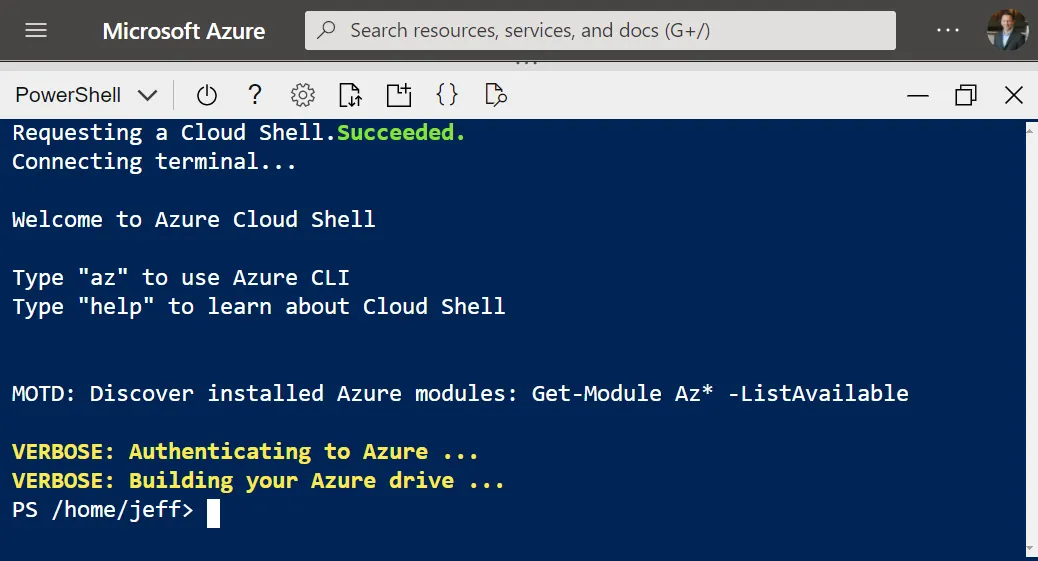
- Once Azure creates the file share, the Cloud Shell sessions starts up. In this case, the PowerShell environment opened on first run.
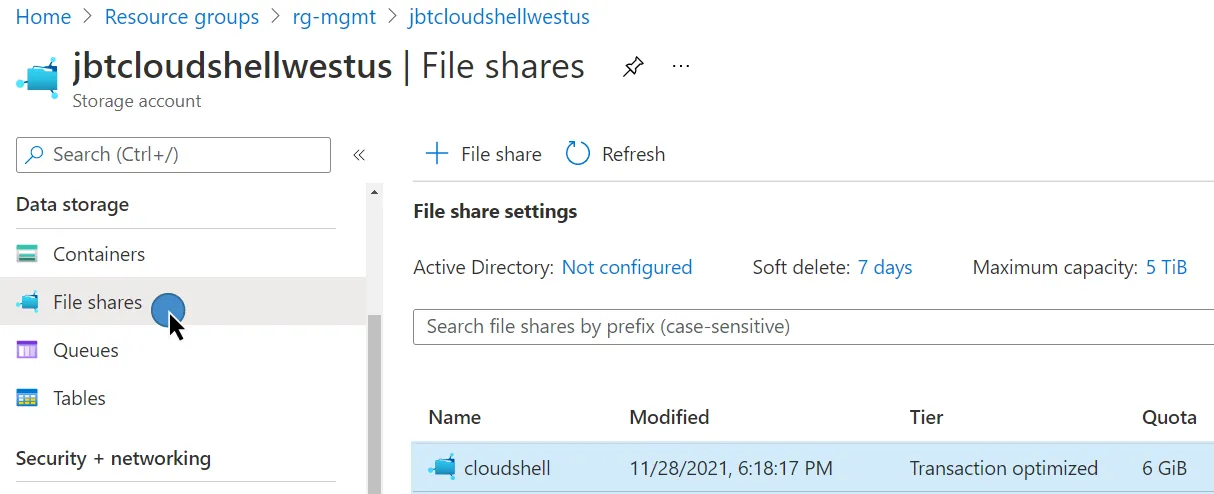
As a bonus step, navigate to the subscription and resource group you selected when configuring the Cloud Shell storage in Step 3. Open the storage account and navigate to File shares. Here you should see the new file share that Cloud Shell uses to store files across sessions.
Back in Step 2, you could have used the basic settings when configuring the Cloud Shell storage. Azure will create the necessary components for you and automatically name the resources using these naming conventions:
- Resource Group:
cloud-shell-storage-<region> - Storage Account:
cs<uniquedGuid> - File Share:
cs-<user>-<domain>-com-<uniquedGuid>
Persist Files Across Sessions
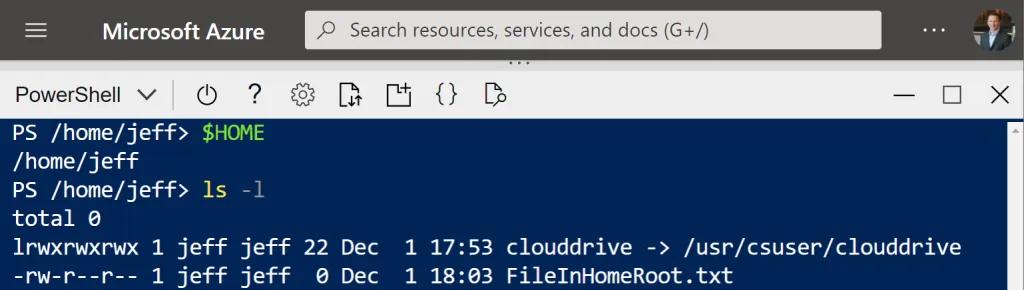
Once you create the file share, Cloud Shell automatically attaches the file share as a folder named clouddrive in your home directory ($HOME). Files and folders saved to the clouddrive are stored in the file share, and Cloud Shell stores any files and folders in the root of $HOME in the container image. Any other files or folders stored outside of these locations are not saved or persisted across sessions.
For example, here is a screenshot showing listing the value of $HOME (/home/jeff) and listing the home directory folders and files. Note there is a file named FileInHomeRoot.txt listed. This file in the home root is stored in the Cloud Shell container image, which is 5 GB in size.
Switching to the clouddrive folder, another directory listing shows a file stored in the clouddrive file share named FileInCloudDriveShare.txt. If you navigate to the storage account and file share created in previous steps, you will find the same file there. This demonstration shows the relationship between the clouddrive and the mounted file share. Cloud Shell stores the 5-GB container image in this same file share too.

Using the Cloud Shell Window
The Cloud Shell window contains a few options for managing the browser-based experience.
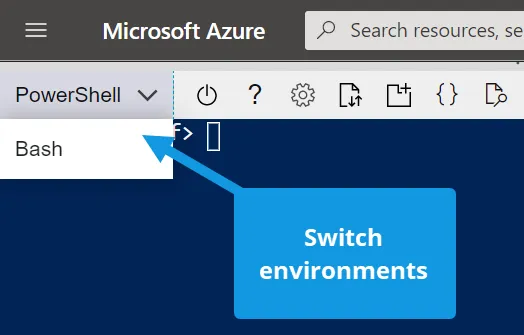
Switch between Bash and PowerShell
Use the environment selector dropdown menu to switch between the Bash and PowerShell environments. Switching between environments connects to the same running container but with a new shell session. Any running processes will go to the background, and Cloud Shell does not preserve your state when switching.
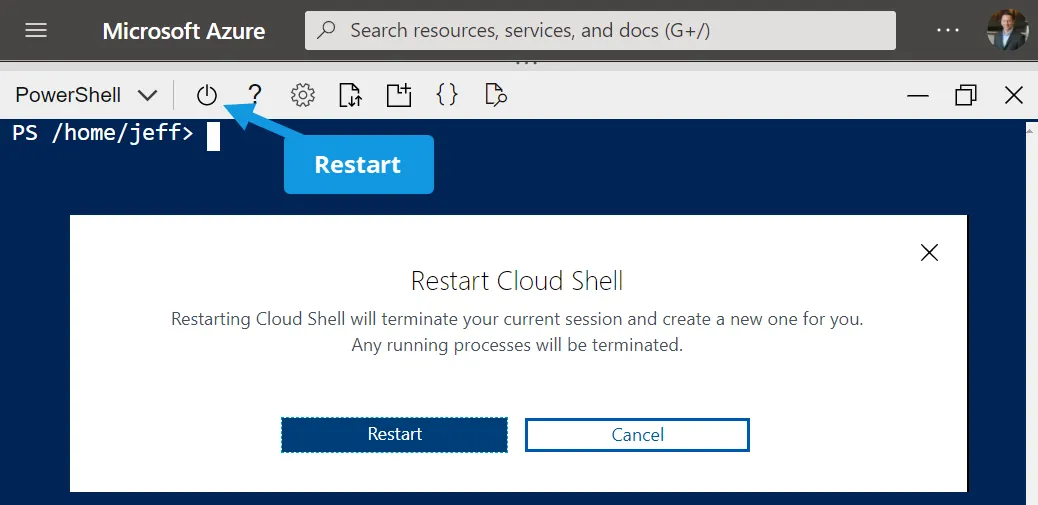
Restart Cloud Shell Session
Use the restart icon in the toolbar to reset the container machine state. Any files not saved in your Azure file share will be lost.
Manage Text Size and Font
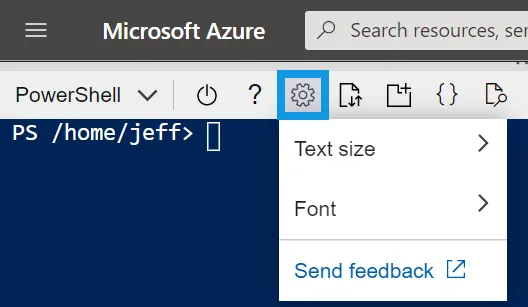
Use the gear icon to select your text size (small, medium, large) and font preferences (Monospace or Courier New). Changes here are persisted across new sessions.
Mangage Files
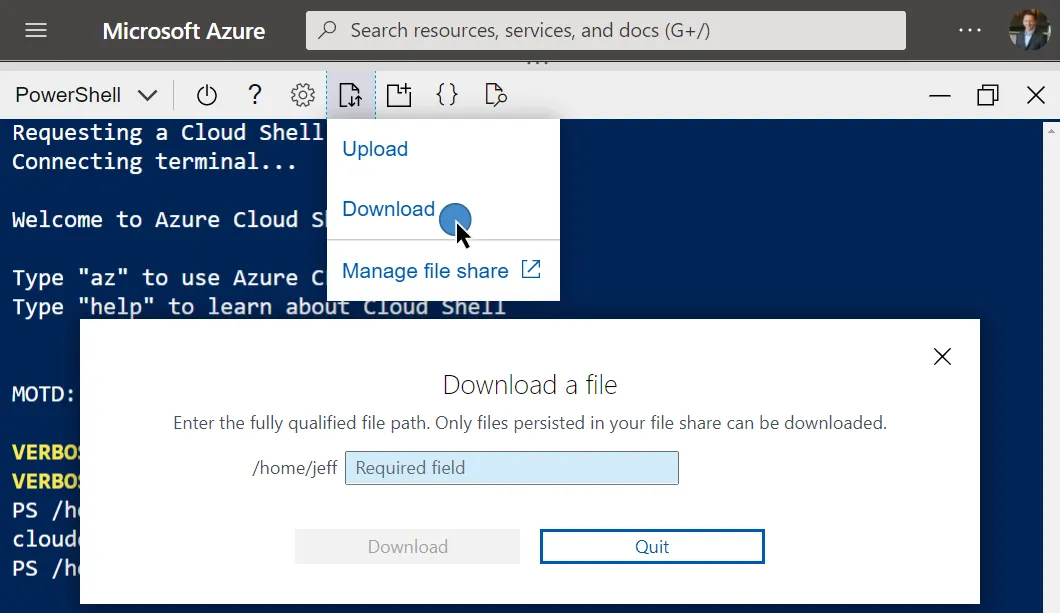
Select the upload/download files icon to manage files stored in the file share. Cloud Shell saves uploaded files to the /home/<user> directory. Downloading files is a bit trickier as you enter the fully qualified file path in the Download a file window instead of using a file browser to select the file. Files and file paths are case-sensitive in the Cloud Shell. You can also access the associated clouddrive file share by selecting Manage file share.
Open a New Session
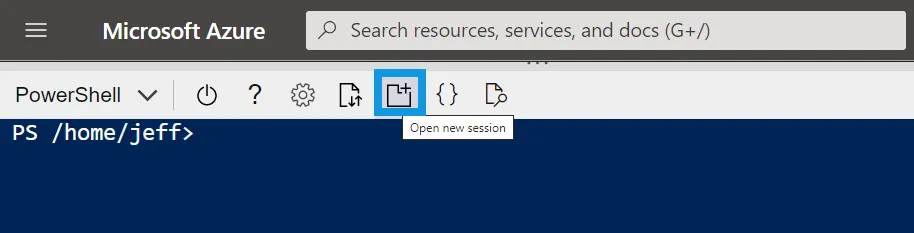
You can have multiple concurrent sessions across browser tabs. Each session exists as a separate process on the same container machine. Select the new session icon, and the browser opens a new tab with a separate Cloud Shell session.
Edit Files with Cloud Shell Editor
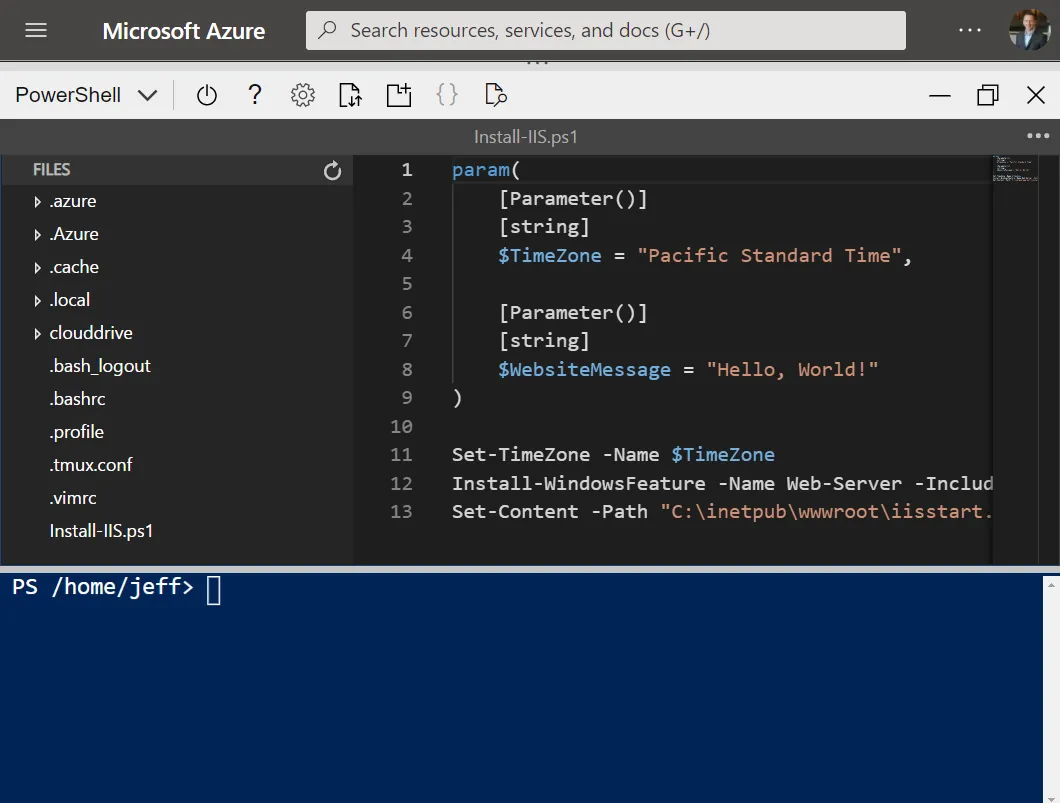
Cloud Shell has an integrated file editor built from the open-source Monaco Editor. The Cloud Shell editor support language highlighting, command palette, and file explorer. You can open the editor using the code editor icon { } from the menu, which opens the editor and defaults to your /home/<user> directory. You can also use the code command to open a directory or a specific file for editing.
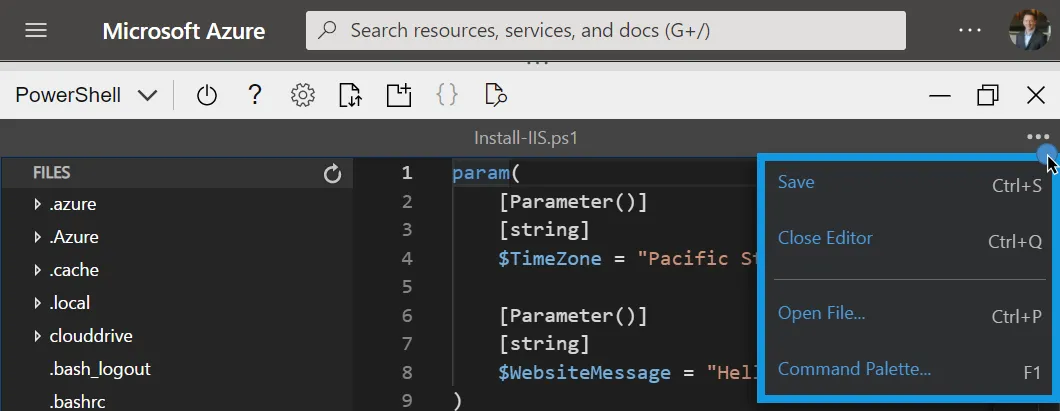
The file editor also has an action panel that supports multiple commands. Select the action panel icon . . . in the upper right corner to view the available actions.
- Save (
Ctrl + S) - Close Editor (
Ctrl + Q) - Open File (
Ctrl + P) - Command Palette (
F1)
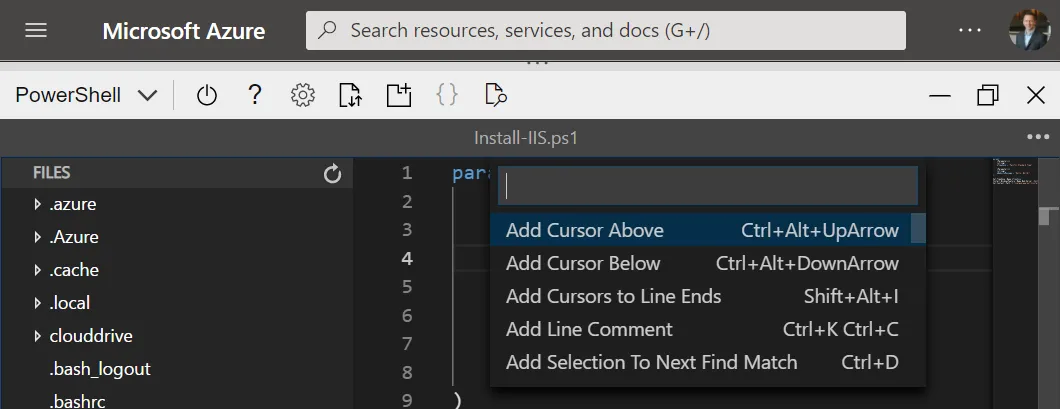
The command palette provides quick access to commands for managing and formatting the file contents.
Preview Web Apps
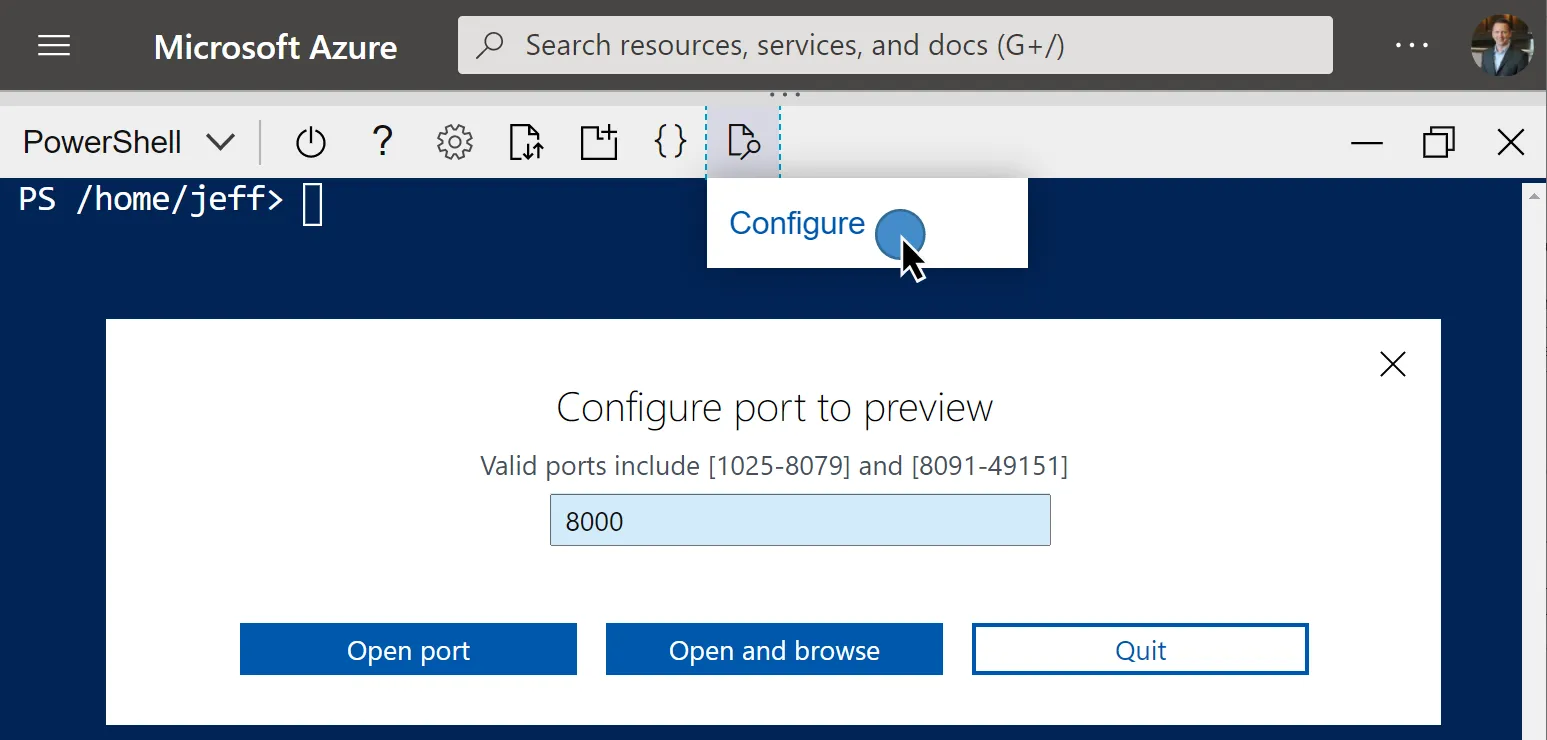
You can run web apps within Azure Cloud Shell, and Web Preview allows you to view those web apps over a configured port. The web app must be able to listen and respond to HTTP requests. To configure the Web Preview port, select the Web preview icon, then choose Configure. Enter a port between 1024 to 49151 (excluding 8080). Then select Open and browse.
Exploring Additional Capabilities
Azure Cloud Shell also includes access to many other tools and features. Here is a list of just a few of these capabilities.
- Linux tools: bash, zsh, sh, tmux, dig
- Azure tools: AzCopy, Azure Functions CLI
- Text editors: code (Cloud Shell Editor), vim, nano, emacs
- Build tools: make, maven, npm, pip
- Source control: git
- Infrastructure as Code/Automation: Terraform, Ansible, Chef, Puppet
See the complete list of tools here on Microsoft Docs.
Closing
The Azure Cloud Shell is a versatile tool for making Azure directly from the browser. In this article, you set up your Cloud Shell environment and explored many of its capabilities. Where do you see using Azure Cloud Shell in your environment?
Enjoyed this article? Check out more of my Azure tutorials here!