OpenID Connect (OIDC) enables GitHub Actions workflows to authenticate and access resources inside your Azure tenant. The primary advantage is you no longer have to store Azure credentials as GitHub secrets in your configuration. This guide will walk you through how to create the necessary Azure identities for authentication, followed by how to create the GitHub secrets and use them in your GitHub Actions workflow.
What is OpenID Connect?
OpenID Connect is an identity layer built on the OAuth 2.0 protocol. It enables secure authentication and authorization between different systems or applications. With OpenID Connect, users can log in to one application using their credentials from another, often called Single Sign-On (SSO).
OpenID Connect is widely used in various scenarios, including web applications, mobile apps, and APIs. It offers a secure and standardized way to enable seamless authentication and authorization across different systems, providing convenience and enhanced security for users and developers alike.
Using OpenID Connect to log in to Azure from GitHub offers several advantages:
- Single Sign-On (SSO): With OpenID Connect, users can authenticate once on GitHub and then seamlessly access Azure resources without needing to enter their credentials again. This improves user experience by eliminating the need for multiple logins.
- Simplified Workflow Automation: OpenID Connect integration allows GitHub Actions workflows to authenticate with Azure using federated credentials. This enables seamless automation of tasks, such as deploying Azure resources or interacting with Azure services, directly from GitHub workflows.
- Secret Management: While you still need to create an Azure application registration, you no longer need to create secrets, which you must store in an external system. Secrets also have expiration dates. Instead, you create federated credentials to authenticate.
- Granular Permissions: When creating the federated credentials, you can authorize specific repositories that can use the identity. You can also limit the use of these credentials based on the environment, branch, pull request, or tag in the repository.
Using OpenID Connect to log in to Azure from GitHub provides a unified authentication experience, enhances security, and improves workflow automation capabilities. It simplifies user management and ensures consistent user identities and permissions across both platforms.
Create a Service Principal in Azure
The first step in connecting GitHub and Azure using OpenID is to create an Entra ID application and service principal. The Azure CLI or Azure PowerShell are excellent methods to create these resources quickly.
Azure CLI
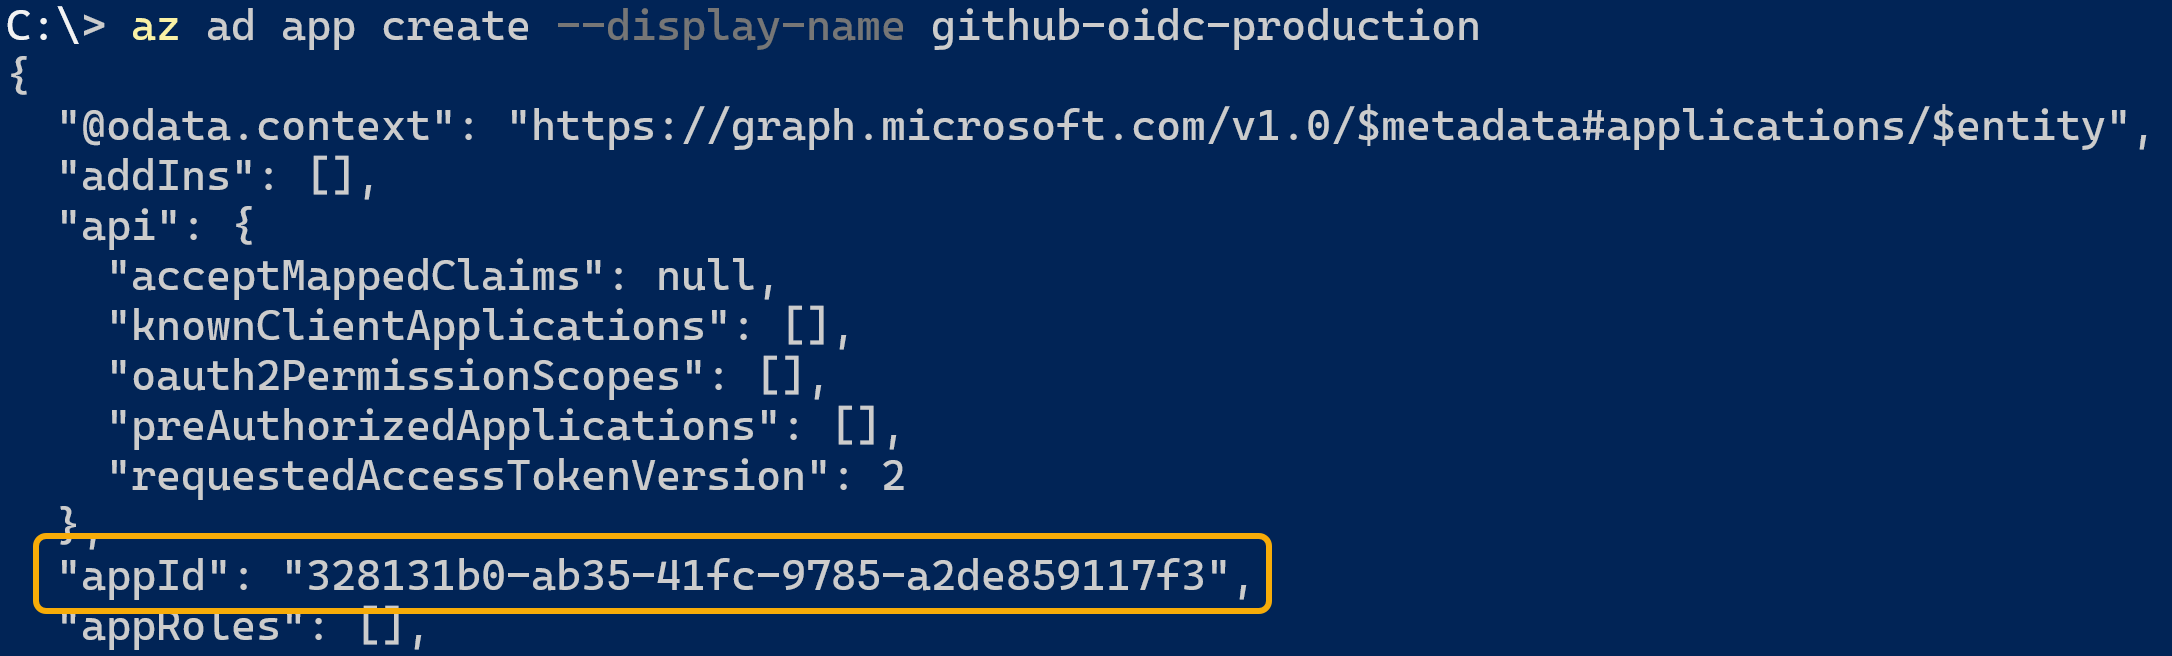
For Azure CLI, create the application registration using the az ad app create command, specifying the display-name for the application. Give the application a descriptive name, such as github-oidc-production. The command outputs an app-id, which is also the client-id. Copy this value to use in the following command.
az ad app create --display-name github-oidc-production
Next, create a service principal using the az ad sp create command, specifying the id using the appId value from the previous output.
az ad sp create --id '<appId>'
Azure PowerShell
For Azure PowerShell, generate the application registration using the New-AzADApplication cmdlet, setting the DisplayName parameter for the application name. The command outputs an AppId, which is also the ClientId. Copy this value to use in the following command.
New-AzADApplication -DisplayName github-oidc-production

Next, create a service principal using the New-AzADServicePrincipal cmdlet, specifying the ApplicationId parameter with the AppId value from the previous output.
New-AzADServicePrincipal -ApplicationId '<AppId>'
Create Federated Credentials
Next, create federated credentials in the application registration you created in the previous step. The federated credentials trust tokens issued by GitHub Actions. The GitHub Actions workflow requests a token for authentication and uses the Azure login action to gain access to your tenant.
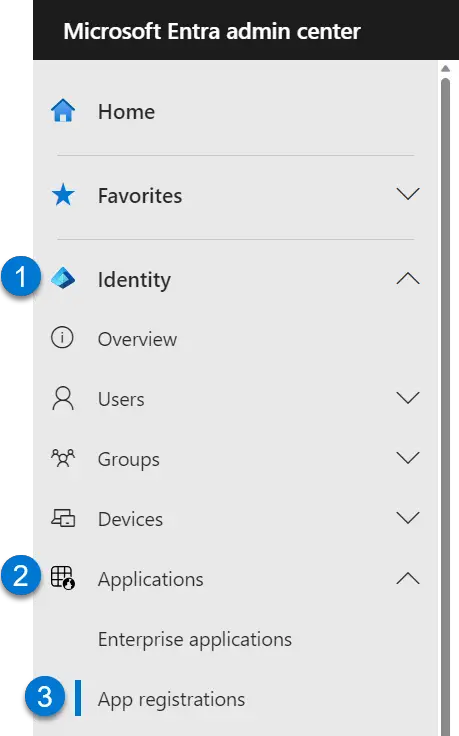
Navigate to the Microsoft Entra admin center (https://entra.microsoft.com) and expand the Identity menu on the left. From there, expand Applications, then select App registrations.
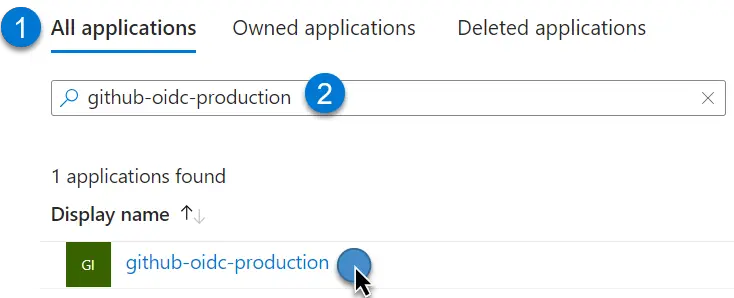
In the App registration window, select the All applications tab, then search for the app registration name created in the previous step. Select the result to view the app registration.
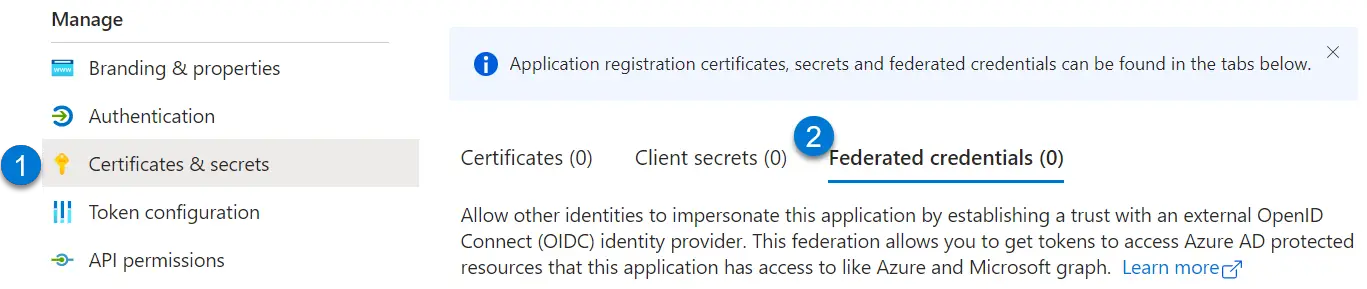
Under Manage, select Certificates & secrets in the app registration window, then select the Federated credentials tab.
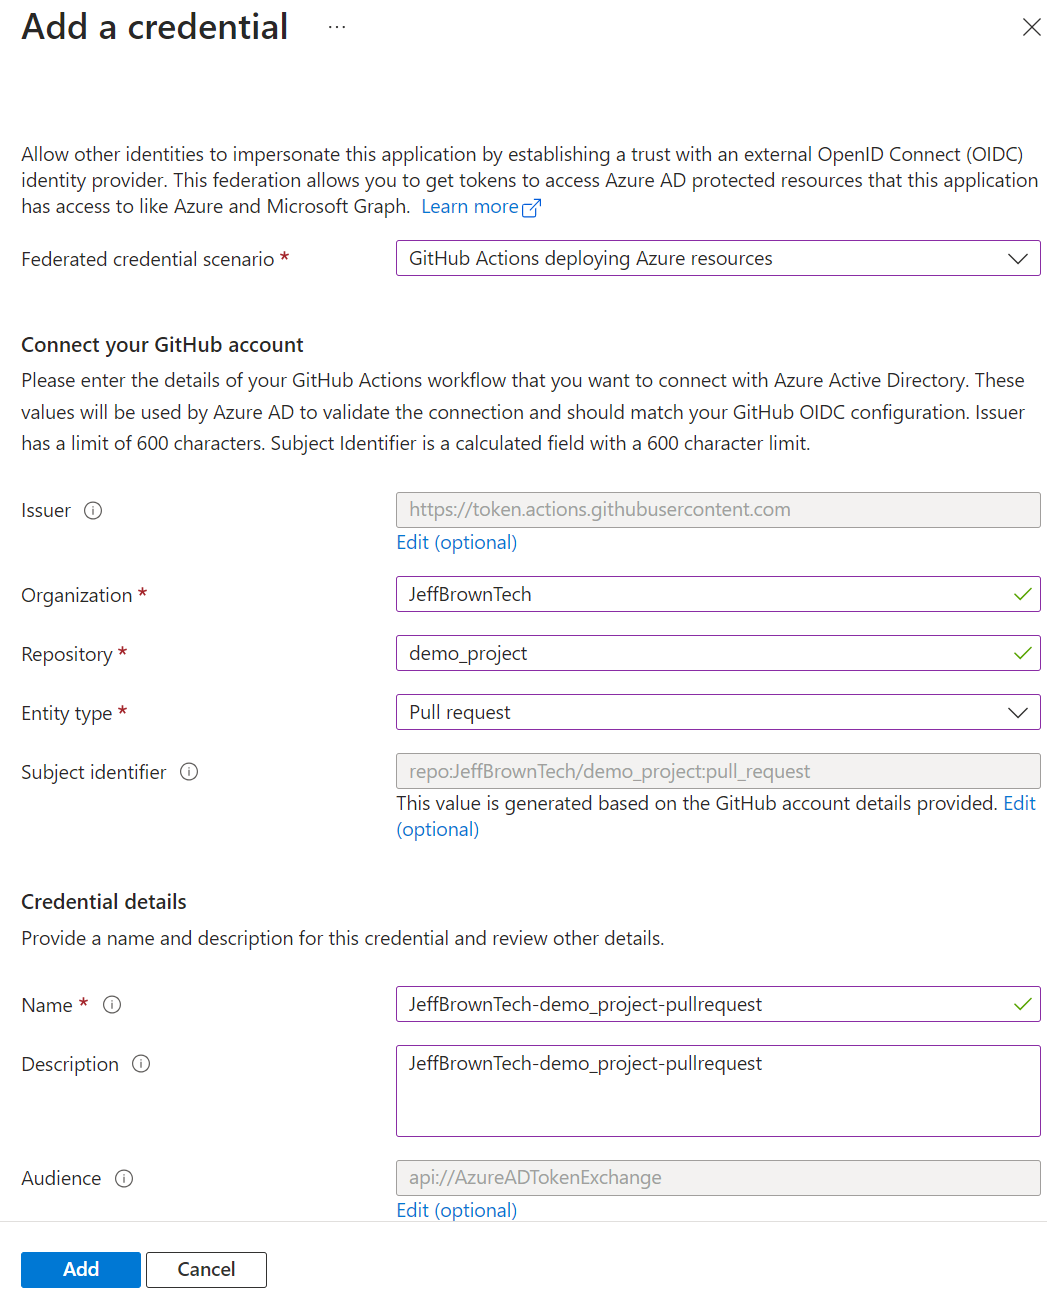
Select + Add credential to create a new federated credential to trust GitHub Actions token requests. In the Add a credential window, select the dropdown menu for Federated credential scenario and select GitHub Actions deploying Azure resources.
Continue filling out the GitHub account information. Enter the Organization and Repository name associated with the GitHub Actions workflow. Select the Entity type to scope the OIDC request from the workflow. Entity type options include Environment, Branch, Pull request, or Tag. This example uses Pull request.
For Credential details, include a Name and Description of the federated credential. Click Add to create the federated credential.
Continue adding federated credentials for each GitHub Action workflow you are creating. You will use the example above for a pull request workflow, but you can also create a federated credential for GitHub environments, repository branches, or tags.
Create GitHub Secrets
Next, you need to create GitHub secrets with the application registration and federated credentials. The GitHub secrets contain the Client ID, Tenant ID, and Subscription ID of the application registration, and GitHub uses these for the login action inside the workflow.
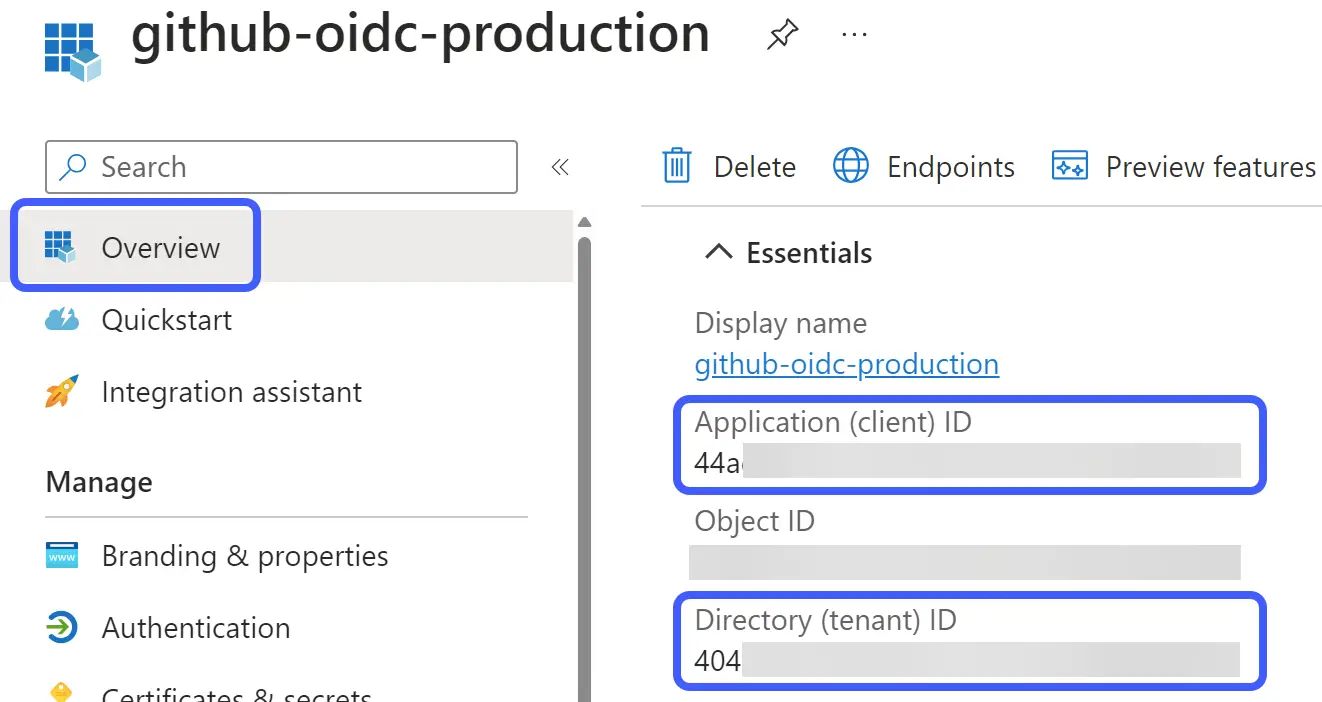
Note: The application registration’s Client ID is the same as the Application ID. The Azure CLI and Azure PowerShell methods displayed this value when you created them earlier in this guide. If you need these values again, return to the application registration in the Azure portal and view the Client ID and Directory (tenant) ID in the Overview section.
Next, navigate to your GitHub account and repository. In the repository, select Settings at the top.

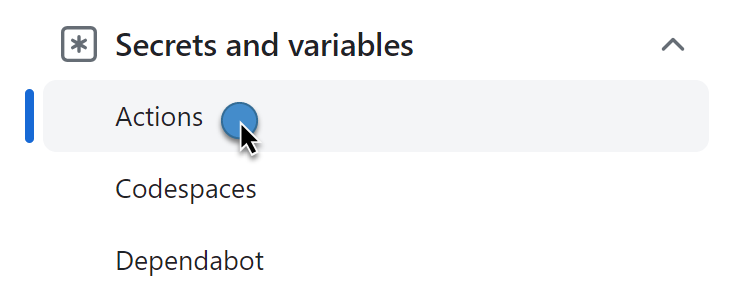
Under Security, expand Secret and variables in the Settings page, then select Actions.
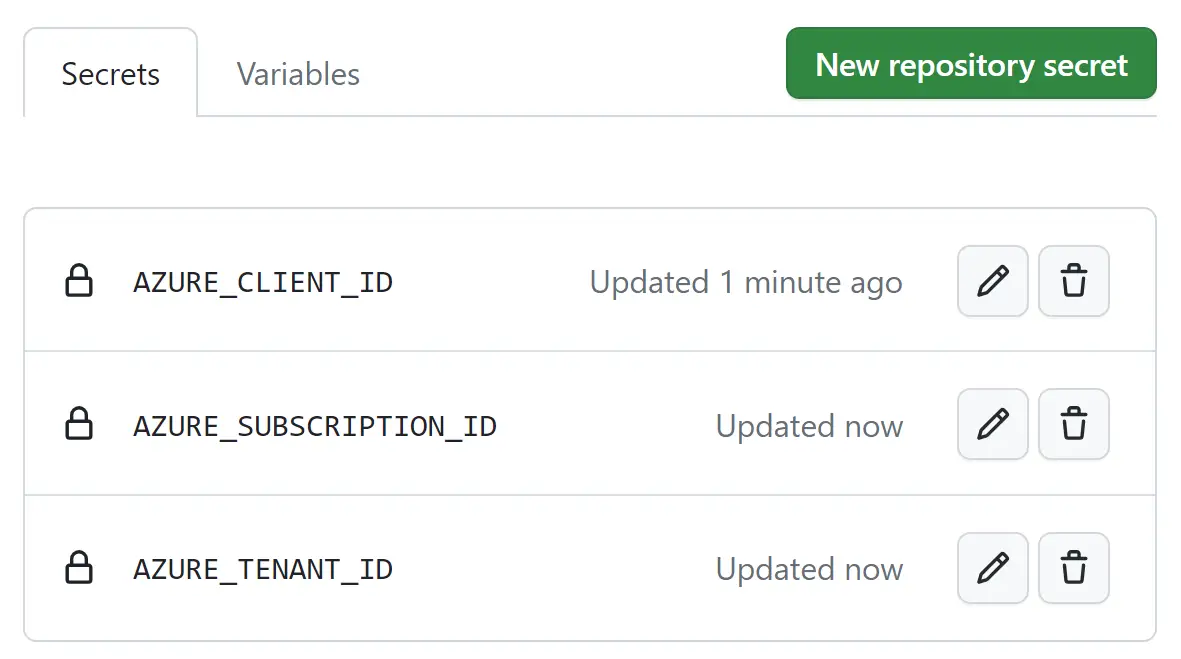
On the Secret tab, select New repository secret. On the New secret page, enter the secret’s Name followed by the Secret value.
The table below shows what you should name each secret and its value. Replace the secret value with the actual values from your environment. Save each secret by clicking Add secret.
| GitHub Secret Name | Secret Value |
|---|---|
| AZURE_CLIENT_ID | <Client ID> |
| AZURE_TENANT_ID | <Tenant ID> |
| AZURE_SUBSCRIPTION_ID | <Subscription ID> |
Authenticate with OpenID Connect
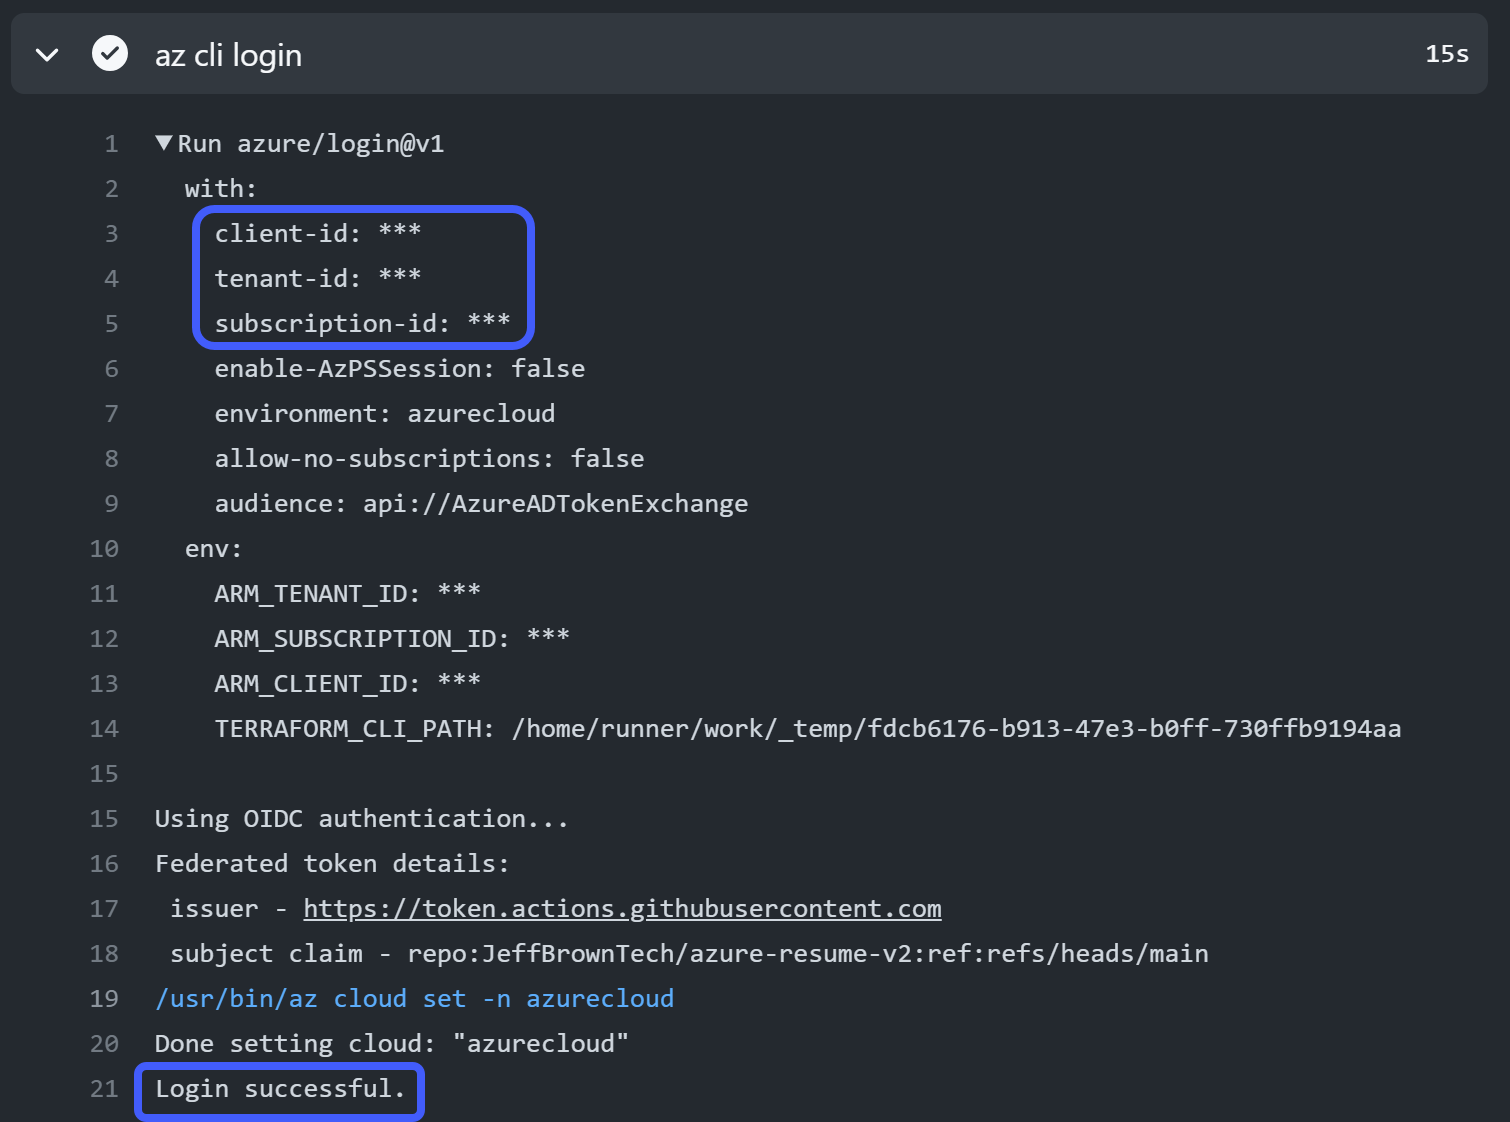
GitHub Actions workflow is now ready to use OpenID Connect to authenticate to Azure. The example below shows the Azure login action with Azure CLI to authenticate to Azure. The secrets you created in the previous step are referenced in the login action’s client-id, tenant-id, and subscription-id values.
- name: az cli login
  uses: azure/login@v1
  with:
    client-id: ${{ secrets.AZURE_CLIENT_ID }}
    tenant-id: ${{ secrets.AZURE_TENANT_ID }}
    subscription-id: ${{ secrets.AZURE_SUBSCRIPTION_ID }}
To verify a successful login, view a workflow run after it has been executed. Find the az cli login step and look for the Login successful message. If you expand the step’s first line, the client-id, tenant-id, and subscription-id values are obfuscated as the workflow retrieves these secret values from the repository settings.
Summary of GitHub and Azure with OpenID Connect
Using OpenID Connect with GitHub and Azure provides a seamless and more secure configuration to deploy and manage Azure. You will no longer need to manage secrets that expire and can use granular permissions to limit when GitHub requests an authentication token.
Reference:
Microsoft Learn: Use GitHub Actions to connect to Azure
GitHub: Configuring OpenID Connect in Azure
Check out more of my Git and GitHub-related articles here!