Managed identities are a great way to enable Azure resources access to services, like Graph API. You can assign granular Graph API permissions for your managed identity through app roles to ensure it has limited access to manage other services.
In this tutorial, you will install the Microsoft Graph PowerShell module and find the right app role to assign to your managed identity.
To follow along with this tutorial, you will need:
- PowerShell version 5.1 or higher
- Azure subscription with administrator rights to managed directory services
Install Microsoft Graph PowerShell Module
First, install the Microsoft.Graph PowerShell module using the Install-Module cmdlet. If prompted to install from an untrusted repository, select Yes to continue.
Install-Module -Name Microsoft.Graph
Connect to Microsoft Graph
Next, connect to your Azure tenant using the Connect-MgGraph cmdlet and set the Scope parameter to Directory.ReadWrite.All.
Connect-MgGraph -Scopes 'Directory.ReadWrite.All'
Related: Microsoft Graph PowerShell Module: Getting Started Guide
Find Managed Identity Object
Managed Identities are a feature in Microsoft Azure that provides a secure way for applications to access Azure services without the need for explicit credentials. They eliminate the manual management of credentials, enhancing security and simplifying the development process by seamlessly integrating with various Azure resources.
Learn More: What are managed identities for Azure resources?
Create a variable named $managedIdentity to store the managed identity object. Use the Get-MgServicePrincipal cmdlet and either specify the ServicePrincipalId or use the Filter parameter to find the object using the DisplayName. The DisplayName will be the name of the Azure resource with the managed identity.
# Get managed identity object using principal ID
$managedIdentity = Get-MgServicePrincipal -ServicePrincipalId '<object id>'
# Or get managed identity object based on managed identity display name
$managedIdentity = Get-MgServicePrincipal -Filter "DisplayName eq '<display name>'"
Find Graph API Application Role
The great thing about Graph API is you can scope permissions to specific actions to limit how much access a user or application can do. Permissions are scoped to delegated or application permissions. This tutorial focuses on an application permission to manage user profiles through the User.ReadWrite.All role.
Learn More: Microsoft Graph permissions reference
Get started by searching the Microsoft Graph enterprise application to find a matching permission scope for your managed identity. The application roles are associated with your tenant’s Microsoft Graph enterprise application object. Use the AppId 00000003-0000-0000-c000-000000000000 with the Get-MgServicePrincipal command to save the object to $graphSPN. The AppId GUID is the same in every tenant.
$graphSPN = Get-MgServicePrincipal -Filter "AppId eq '00000003-0000-0000-c000-000000000000'"
Create a variable named $permission to store the desired permission scope. The permission scope in the example below is User.ReadWrite.All. This permission enables making changes to user profiles.
# Set permission scope
$permission = "User.ReadWrite.All"
Next, search the AppRoles associated with the Microsoft Graph enterprise application ($graphSPN) that match $permission and are of Application type. Save the results to a variable named $appRole.
# Find app role with those permissions
$appRole = $graphSPN.AppRoles |
    Where-Object Value -eq $permission |
    Where-Object AllowedMemberTypes -contains "Application"
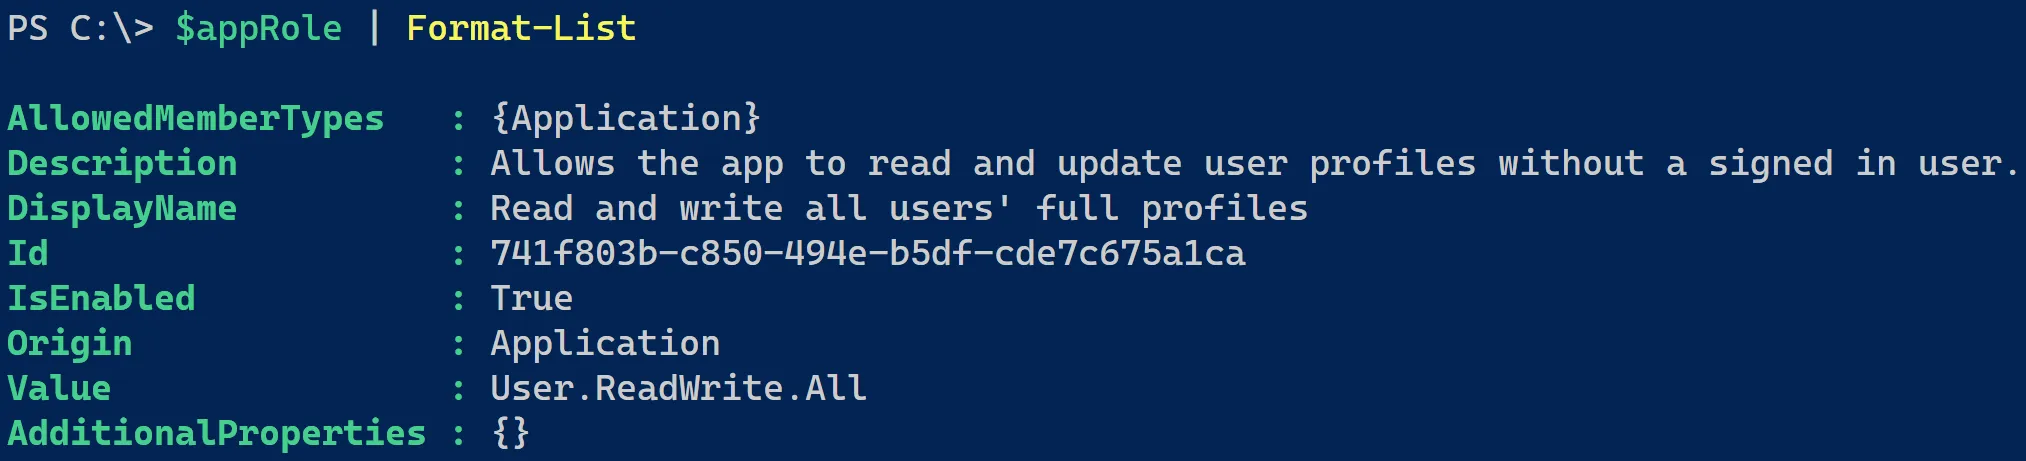
Output the $appRole value using Format-List to view the matching Graph API application role. Note the Value matches the permission scope you set earlier, and the description matches the permissions needed for your application.
Create App Role Assignment for Managed Identity
The final step is to assign the matching app role to the managed identity object.
First, create a hash table named $bodyParam using keys names PrincipalId, ResourceId, and AppRoleId with values from our previously saved variables. Use the New-MgServicePrincipalAppRoleAssignment cmdlet and specify the ServicePrincipalId ($managedIdentity.Id) and use the hash table for the BodyParameter ($bodyParam).
Related: PowerShell Hash Table vs. PSCustomObject: Deep Dive & Comparison
$bodyParam = @{
    PrincipalId = $managedIdentity.Id
    ResourceId  = $graphSPN.Id
    AppRoleId   = $appRole.Id
}
New-MgServicePrincipalAppRoleAssignment -ServicePrincipalId $managedIdentity.Id -BodyParameter $bodyParam
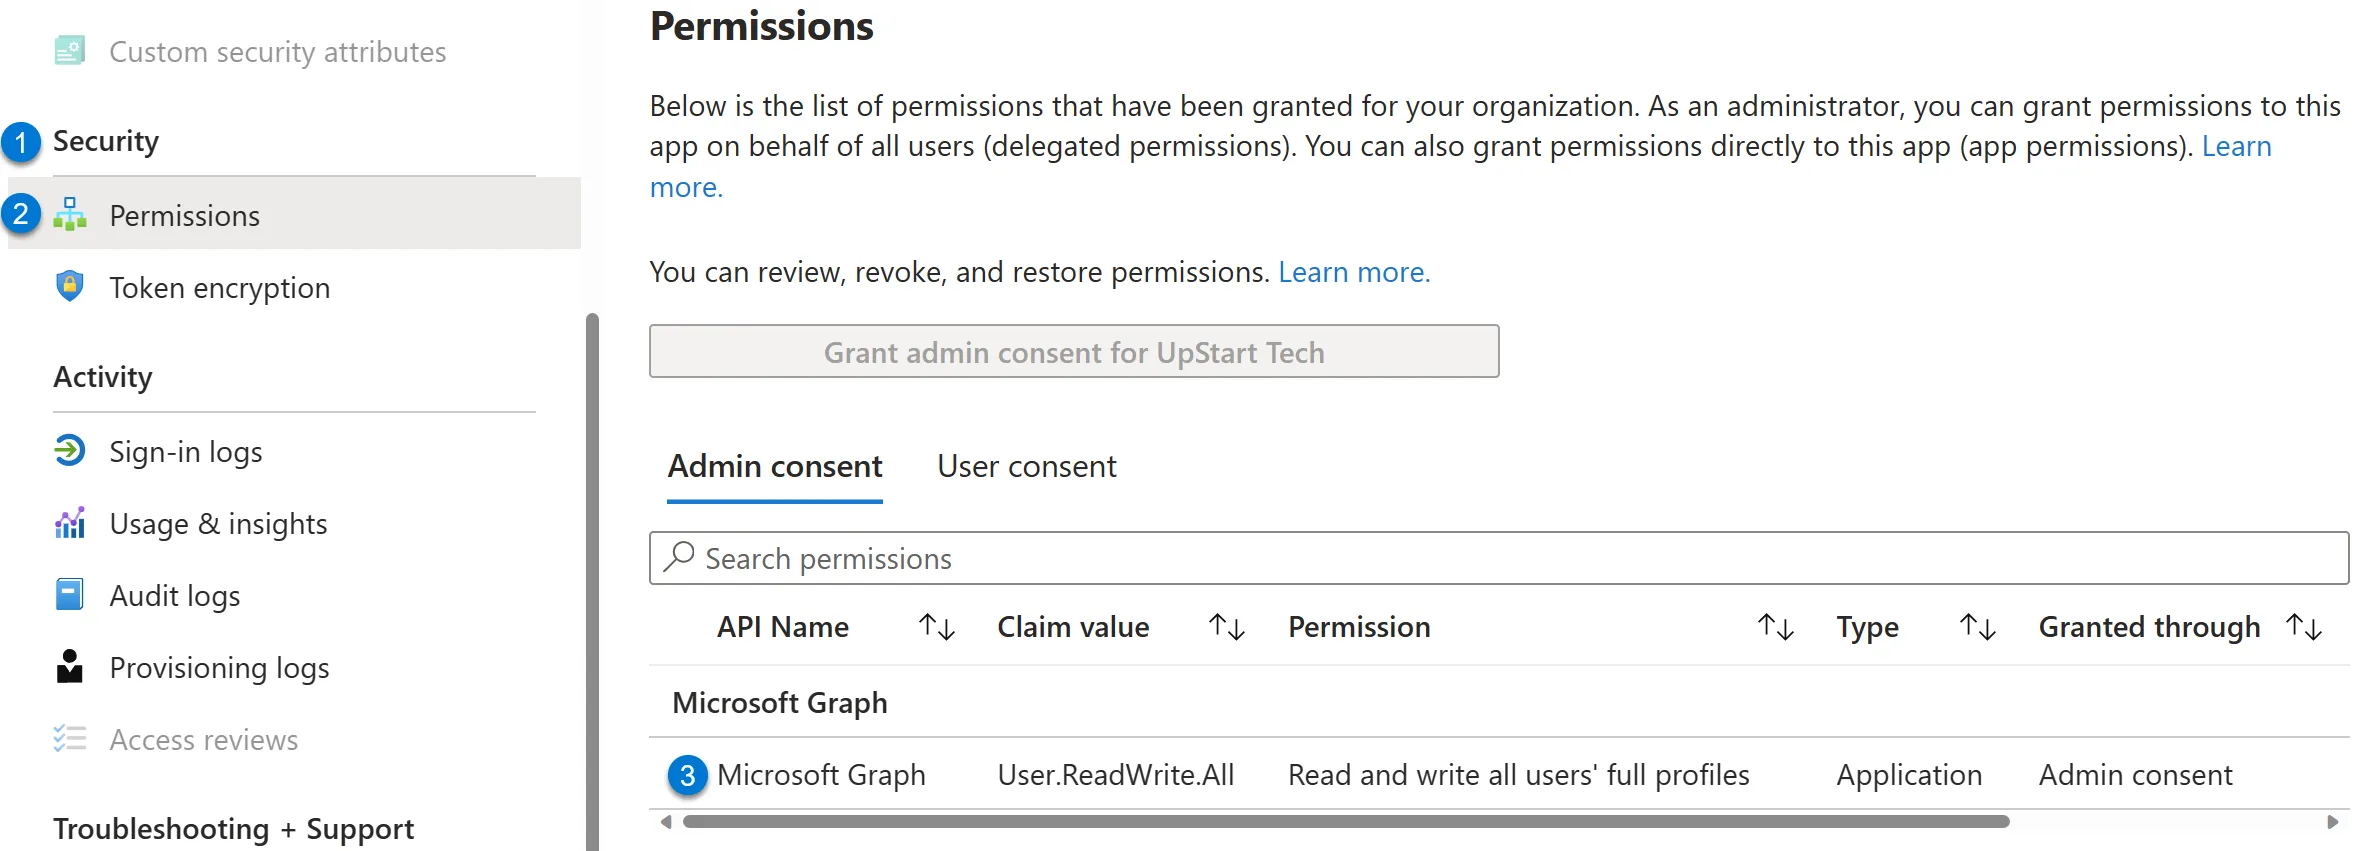
Verify the app role assignment by navigating to the managed identity enterprise application Entra ID. In the enterprise application, navigate to Security > Permissions. The Permissions window displays the newly assigned app role for the managed identity.
Graph API and Managed Identity Conclusion
Managed identities are a great way to grant Azure resources permission to access other resources or services. One of these services is Graph API, which allows programmatic access to many Microsoft cloud services. This tutorial showed you how to use PowerShell to find Graph API application roles and assign them to your managed identity.
