Are you working with GitHub repositories but tired of typing in your username and personal access token each time you clone or push changes? You need to use SSH authentication! Using the SSH protocol, you can connect and authenticate to GitHub without typing in a password.
In this tutorial, you will learn:
- How to check for existing SSH keys
- Generate an SSH key
- Add the SSH key to your GitHub account
- Test your SSH connection
Prerequisites
If you want to follow along with this tutorial, you will need:
- A GitHub account (sign up here)
- Download and install the Git utility
- A repository to download (create a repo here)
- A Windows 10 computer
Why use SSH Authentication?
Configuring SSH authentication allows you to download your repositories and upload changes without supplying a username and password. Without configuring SSH authentication, you cannot download your repositories if you are using the SSH protocol. Let’s demonstrate what this looks like.
- Navigate to your GitHub account and sign in.
- Access one of your repos. This tutorial is using the author’s Python repo.
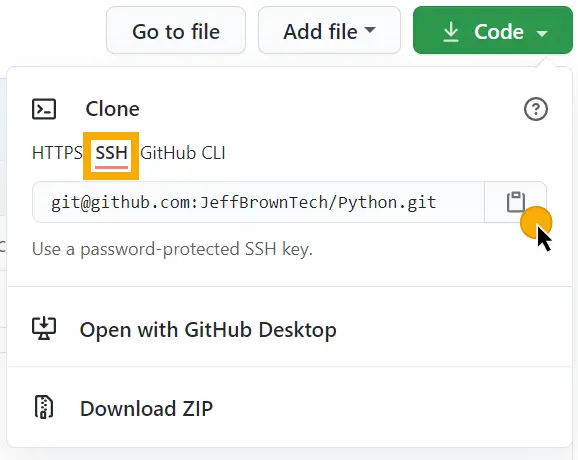
- On the repo home page, select the Code button.
- In the code button, ensure the SSH tab is select.
- Copy the SSH URI using the copy button.
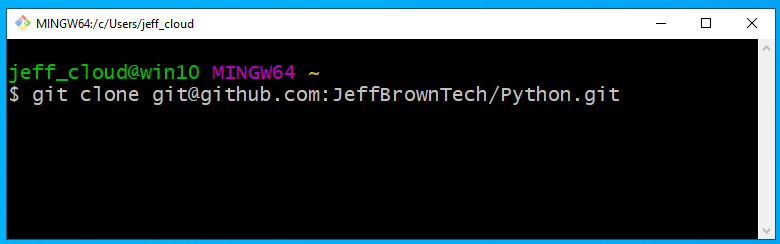
- With this SSH URI copied, open the Windows 10 Start Menu and select the Git Bash program.
- In the Git Bash console, run the git clone command and paste the SSH URI copied earlier. This action will download the repo to your local system. If you receive a message about continue connecting, enter yes.
git clone <SSH URI>
- Since you don’t have an SSH public key configured, you are unable to download your own public repository! Git responds with the message:
fatal: Could not read from remote repository.
Please make sure you have the correct access rights and the repository exists.

Now that you’ve seen what it looks like without SSH authentication configured, continue with the tutorial to learn how to configure SSH authentication.
Check for Existing SSH Keys
Now, this might seem like a silly step. Why check for existing keys? Just in case you have an existing public/private key pair that you can reuse! To verify if you have an existing SSH key:
- Open Git bash console if you closed it from the previous step.
- Ensure you are in your home directory by running the command
cd $home. - Enter
ls -al ~/.sshto see if any existing SSH keys are available.
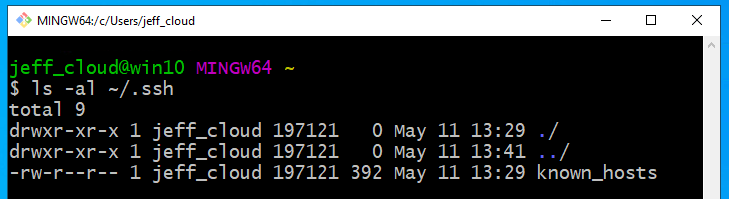
- Check to see if any of the following files already exist. If they do, you already have an SSH key to use. We are going to assume you don’t before moving onto the next section.
- id_rsa.pub
- id_ecdsa.pub
- id_ed25519.pub
Generate New SSH Key
Now that you have established you don’t have an existing SSH key, it’s time to generate one!
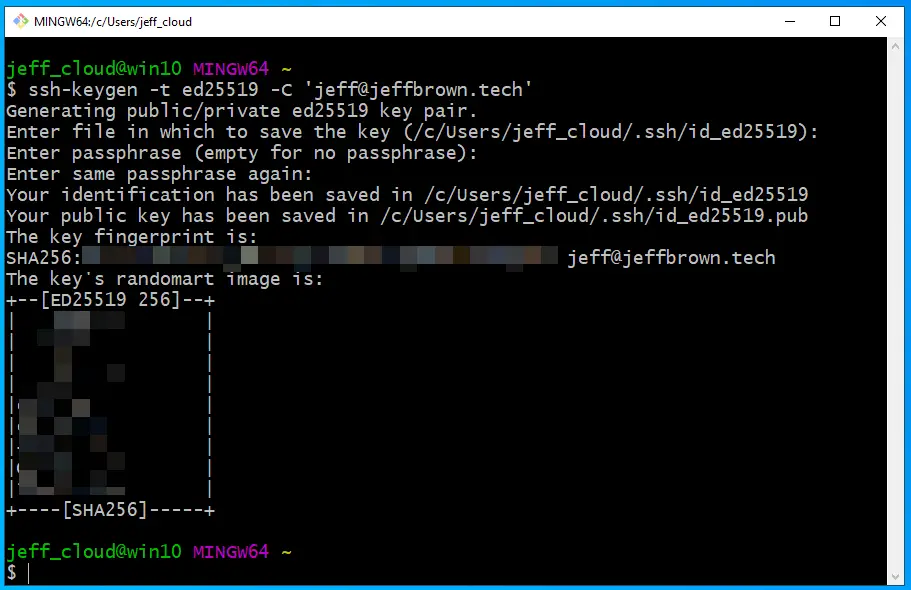
- Return to the Git bash console.
- Enter the following command, substituting your email address with the one associated with your GitHub account.
ssh-keygen -t ed25519 -C 'your_email@domain.com'
- When prompted where to save the key pair file, press Enter to accept the default.
- When prompted to enter a passphrase, enter a passphrase, or press Enter to leave it blank. Adding a passphrase adds security to the SSH key, but you have to enter it each you authenticate. This tutorial is leaving the passphrase blank.
- The public key, SHA256 hash, and randomart image is display in the bash console.
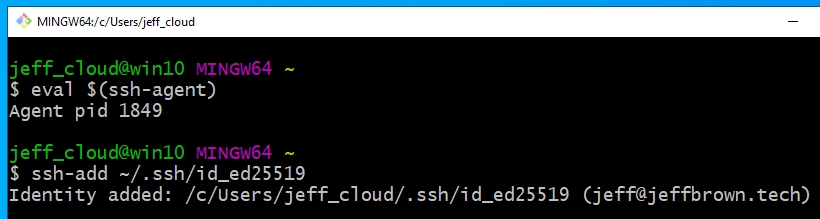
Next, add the SSH key to the SSH agent. The SSH agent manages your SSH key and remembers your passphrase so you don’t have to reenter it each you use your SSH key.
- Ensure the ssh-agent is running by using the following command:
eval $(ssh-agent)
- Add the SSH private key to the ssh-agent using the following command:
ssh-add ~/.ssh/id_ed25519
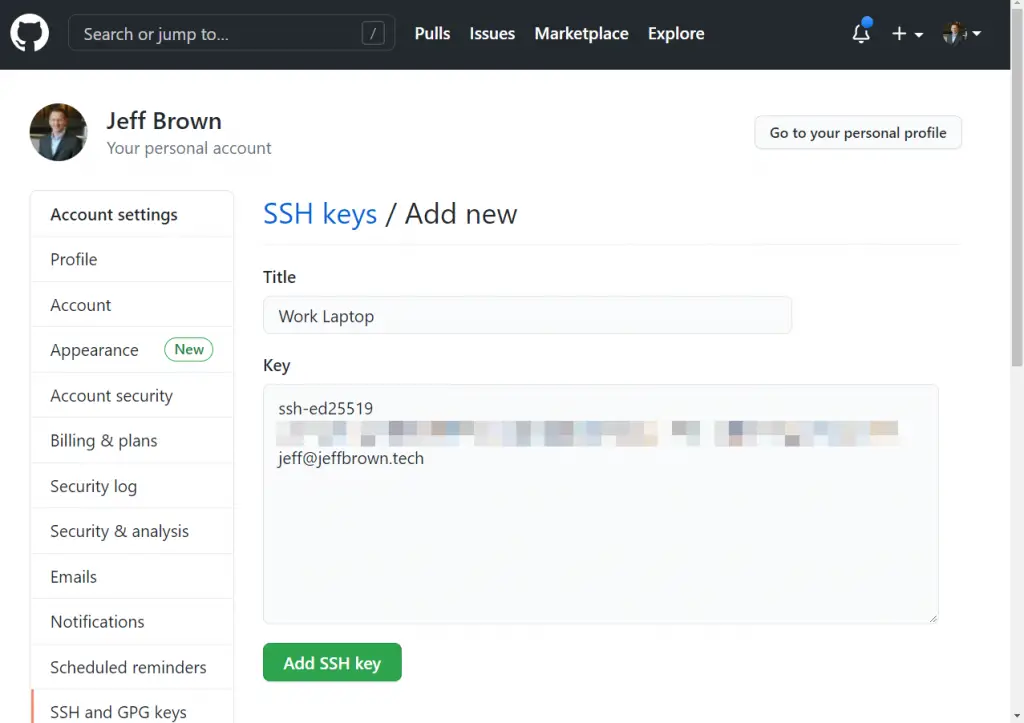
Add SSH Key to GitHub Account
With the SSH key generated on your local system, it is time to add the public key to GitHub. Adding the public key to GitHub allows your local system to use the private key pair to authenticate.
- In the Git bash console, copy the SSH public key to your clipboard using the clip command.
clip < ~/.ssh/id_ed25519.pub
- Navigate back to GitHub and log in with your account.
- In the upper-right corner, select your profile photo, then select Settings.
- In the Settings sidebar, select SSH and GPG keys.
- Click on the New SSH key button.
- Enter a description of the key in the Title field. This should describe which system uses the key so you can identify it later.
- Paste the public key into the Key field.
- Finish by selecting Add SSH key.
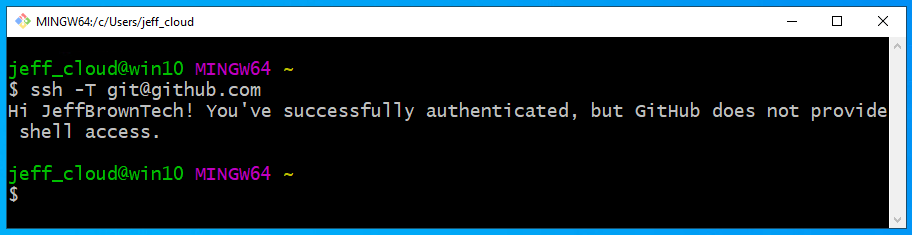
Test your SSH Connection to GitHub
With the key added, you can test your connection to verify the SSH key is working.
- In the Git bash window, enter the following command to test the SSH connection out to github.com. If you receive a warning about host authenticity, enter yes, then press enter.
ssh -T git@github.com
- Verify the returning message displays your username. If so, you’ve successfully authenticated out to GitHub using your new SSH key!
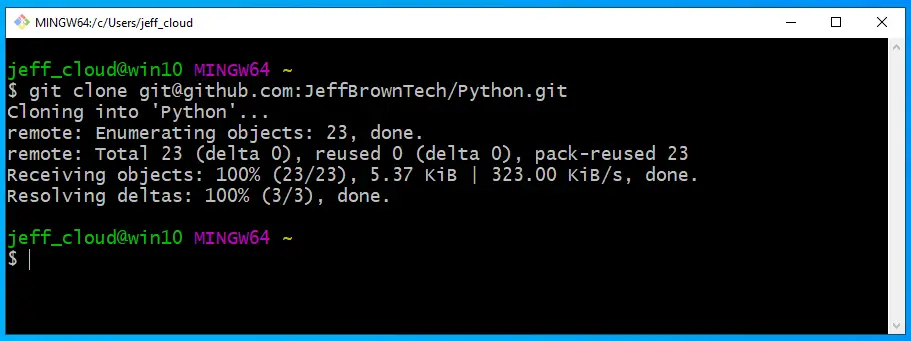
If I attempt to clone one of my repos using the SSH URI, the command should now be successful.
Summary
With the SSH key now generated and added to your GitHub account, you no longer need to enter your password and access token to authenticate. Using SSH keys provides a seamless experience when working with remote Git repositories.
Check out more of my articles around working with Git!
