Are you struggling to validate your source code automatically? Or ensure you are following best practices? One way of automating validation is to use a linter against your source code. Sounds like you need to add Super-Linter to your Azure DevOps Pipelines!
In this post, you will learn what Super-Linter is and how to add a code verification step to your Azure DevOps pipeline. To follow along, you will need:
- Access to an Azure DevOps organization.
- Source code to validate. This example uses an ARM template to deploy a storage account.
What is Super-Linter?
Super-Linter (GitHub repository) is a GitHub Action for validating source code by combining various linters together. Linters aim to improve your code by checking for best practices, errors, potential bugs, and stylistic errors. Incorporating a linter in your build pipelines allows you to catch mistakes early in development before rolling out a code change.
Super-Linter supports many programming and configuration languages, such as:
- Ansible
- Azure Resource Manager (ARM)
- Golang
- JavaScript
- PowerShell
- Terraform
- YAML
And many more. Check out the complete list of supported linters here.
Add Super-Linter to Azure DevOps Pipelines
While Super-Linter is a built-in GitHub Action, Super-Linter is also available as a Docker image for local use. This configuration allows you to incorporate Super-Linter into other continuous integration tools, like Azure DevOps Pipelines. The following example uses the YAML pipeline method over the classic method.
Download Super-Linter Docker Image
First, create a step using the script keyword. Use the docker pull command to download the latest version of Super-Linter from GitHub’s Docker repository.
- script: |
    docker pull github/super-linter:latest
    displayName: Pull github/super-linter docker image
Add Super-Linter Steps to Azure DevOps Pipeline
Next, use another script step to use the docker run command to start the image in a new container. Use the -e option to specify environment variables specific to the Super-Linter image. The first environment variable is RUN_LOCAL=true. This flag bypasses some of the GitHub Action checks and allows mapping the codebase to another directory (more on this later).
The next variable sets which linters for Super-Linter to use for validation.
- If no languages are specified, all languages default to true, and all matching files are checked.
- If one or more languages are passed as true, only those languages are validated. All other languages are ignored.
- If one or more languages are passed as false, then all other languages are validated. Only languages set to false are ignored.
- If you try to set a language to both true and false, Super-Linter will fail.
This tutorial tests an ARM template for deploying a storage account, so the environment variable VALIDATE_ARM is set to true. Super-Linter ignores all other languages and files.
Check out more of the environment variables and languages to validate here on the Super-Linter GitHub page.
Next, use the -v option to mount the pipeline’s default working directory $(System.DefaultWorkingDirectory) to the /tmp/lint directory in the container image. In this case, the default working directory contains all the files from the code repository, including the ARM JSON templates to validate.
Finally, specify the image to run (github/super-linter). The backslash (\) is for a multi-line command with each option on its own line for readability.
- script: |
    docker run \
      -e RUN_LOCAL=true \
      -e VALIDATE_ARM=true \
      -v $(System.DefaultWorkingDirectory):/tmp/lint \
      github/super-linter
  displayName: super-linter validation
Here are both steps defined in a stage called PreDeployment in a job titled Code_Validation.
stages:
- stage: PreDeployment
  jobs:
    - job: Code_Validation
      steps:
      - script: |
          docker pull github/super-linter:latest
        displayName: Pull github/super-linter docker image
      - script: |
          docker run \
            -e RUN_LOCAL=true \
            -e VALIDATE_ARM=true \
            -v $(System.DefaultWorkingDirectory):/tmp/lint \
            github/super-linter
        displayName: super-linter validation
If you want to see the full pipeline, including additional ARM template validation and deployment steps, check out the YAML file here:
GitHub | JeffBrownTech | azdo-super-linter-example | azure-pipelines.yml
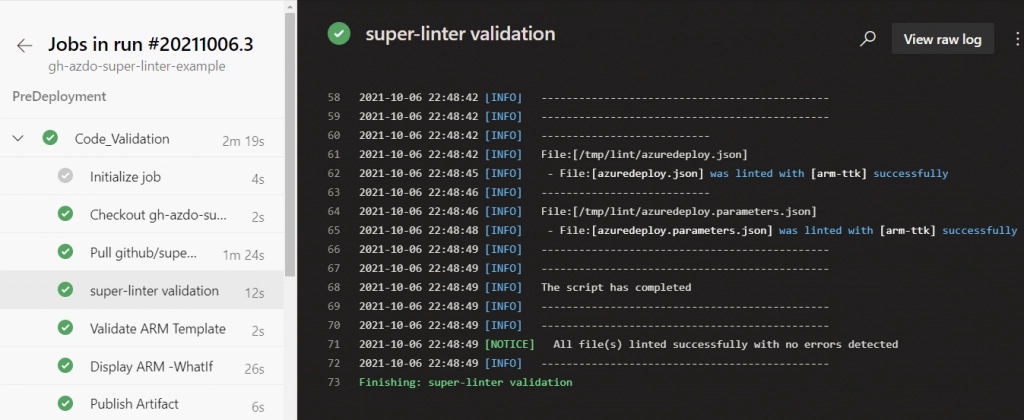
View Linter Results
In the pipeline, the super-linter validation step appears, and, if successful, will show a green checkmark that the linter found no issues. On lines 62 and 65 in the console output window, you see the files the linter checked, including the module (arm-ttk) that Super-Linter used to validate the files.
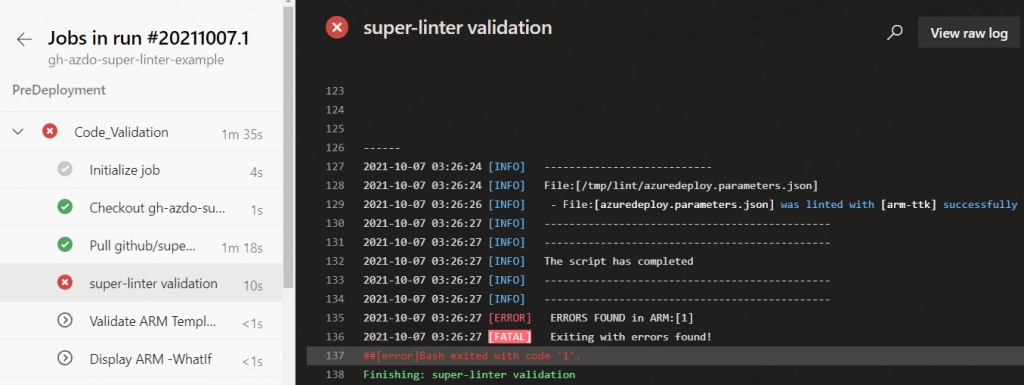
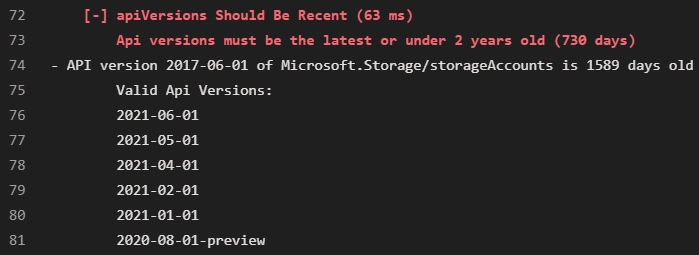
If the linter finds any errors, the step will fail, and the console window will explain the issue. For example, here are some deliberate errors inserted into the template:
- The
Microsoft.Storage/storageAccountAPI version is too old - The resource location is hardcoded using
resourceGroup().location - An unused
Locationparameter
The failure stops the build and deployment process while you sort the problems out!
Below are screenshots from the console window showing each error Super-Linter found:


Closing
Validating code before deployment only adds to the integrity of your automated processes. Super-Linter provides an all-in-one solution for validating multiple types of languages and configuration files. Add this step to your pipelines today!
Enjoyed this article? Check our more of my Azure content here!