While Azure Resource Manager (ARM) templates have complex syntax, it is also mighty. Instead of copying and pasting the same code to create a resource, you can use the copy loop functionality instead. Copy loops allow you to create multiple resources in your ARM template dynamically.
In this post, you will learn about the copy loop syntax and how to use it on resources and resource properties.
Prerequisites
To follow along in this tutorial, you will need:
- An Azure subscription and permissions to create resources, like Owner or Contributor
- Azure PowerShell module installed
- Connect to Azure tenant using Connect-AzAccount
Introduction to ARM Template Copy
The copy loop syntax has four components:
- Name: a value that indicates the loop
- Count: number of loop iterations
- Mode: indicates whether to create the resources at the same time (parallel) or deploy in sequence (serial)
- Batch Size: When the mode is serial, indicates the number of instances to deploy at a time
At a minimum, you need the Name and Count size. A copy loop’s default mode is parallel. Here is the ARM template syntax for a copy loop:
"copy": {
  "name": "<loop name>",
  "count": <loop count>,
  "mode": "<serial | parallel>",
  "batchSize": <serial batch size>
}
Since you are creating multiple resources, you can use the copyIndex() to reference the current iteration of the loop. You append the iteration to the name of the resource to uniquely identify it. The copy loop is zero-based, meaning the first iteration is 0. However, you can specify the starting index when using the copyIndex() function. You’ll see examples of these in the upcoming examples.
Deploying Multiple Storage Accounts
An easy resource to demonstrate the copy loop with is a storage account. Azure provisions storage accounts quickly, and storage accounts are free if you are not storing any data in them.
Here is the resource section of an ARM template with a storage account definition and a copy loop section (lines 15 – 18). The copy loop’s name is saCopy and has a count of 2, meaning it will loop through this resource two times.
Note on line 6 that the name of the resource is generating by concatenating the string sajbtcopydemo with the current copy loop index. This name definition will generate two storage accounts named sajbtcopydemo0 and sajbtcopydemo1.
{
    "$schema": "https://schema.management.azure.com/schemas/2019-04-01/deploymentTemplate.json#",
    "contentVersion": "1.0.0.0",
    "resources": [
        {
            "name": "[concat('sajbtcopydemo', copyIndex())]",
            "type": "Microsoft.Storage/storageAccounts",
            "apiVersion": "2019-06-01",
            "location": "[resourceGroup().location]",
            "kind": "StorageV2",
            "sku": {
                "name": "Standard_LRS",
                "tier": "Standard"
            },
            "copy": {
                "name": "saCopy",
                "count": 2
            }
        }
    ]
}
Save the above code to a file name azuredeploy.json. To deploy the ARM template, use the New-AzResourceGroupDeployment command specifying the resource group name and template parameter file path.
New-AzResourceGroupDeployment `
    -ResourceGroupName "<resource group name>" `
    -TemplateFile azuredeploy.json
Once Azure completes the deploy, the resource group contains the two storage accounts. Both storage accounts are the same except the number at the end, which indicates which loop iteration the template created it.

If you don’t want to start at 0 for the loop iteration, pass a different value into the copyIndex() function. Here is the same example from above, except the copyIndex() function has a value of 44. With a count of 2, this example creates storage accounts appended with 44 and 45.
{
    "$schema": "https://schema.management.azure.com/schemas/2019-04-01/deploymentTemplate.json#",
    "contentVersion": "1.0.0.0",
    "resources": [
        {
            "name": "[concat('sajbtcopydemo', copyIndex(44))]",
            "type": "Microsoft.Storage/storageAccounts",
            "apiVersion": "2019-06-01",
            "location": "[resourceGroup().location]",
            "kind": "StorageV2",
            "sku": {
                "name": "Standard_LRS",
                "tier": "Standard"
            },
            "copy": {
                "name": "saCopy",
                "count": 2
            }
        }
    ]
}
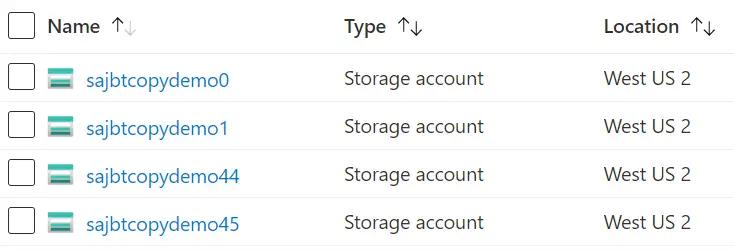
Here are all four storage accounts now in the resource group, two created with the default index starting at 0, two created with the index starting at 44.
Getting Advanced with Parameters
ARM templates use parameters to make the deployment more dynamic. With copy loops, you use parameters to specify the loop count and starting index. Here is the storage account with parameters for copyCount and copyStart, which defaults to 0 if not specified.
{
    "$schema": "https://schema.management.azure.com/schemas/2019-04-01/deploymentTemplate.json#",
    "contentVersion": "1.0.0.0",
    "parameters": {
        "copyCount": {
            "type": "int",
            "metadata": {
                "description": "Number of storage accounts to provision."
            }
        },
        "copyStart": {
            "type": "int",
            "metadata": {
                "description": "Index to start copy at."
            },
            "defaultValue": 0
        }
    },
    "resources": [
        {
            "name": "[concat('sajbtcopydemo', copyIndex(parameters('copyStart')))]",
            "type": "Microsoft.Storage/storageAccounts",
            "apiVersion": "2019-06-01",
            "location": "[resourceGroup().location]",
            "kind": "StorageV2",
            "sku": {
                "name": "Standard_LRS",
                "tier": "Standard"
            },
            "copy": {
                "name": "saCopy",
                "count": "[parameters('copyCount')]"
            }
        }
    ]
}
Now the ARM template is more flexible and can be modified on execution. Here are a few examples of specifying the copyCount and copyStart parameters using Azure PowerShell:
# Creates 3 storage counts starting the index at 99
New-AzResourceGroupDeployment `
    -ResourceGroupName 'armcopydemo-rg' `
    -TemplateFile azuredeploy.json `
    -copyCount 3 `
    -copyStart 99
# Creates 5 storage accounts starting at the default index 0
New-AzResourceGroupDeployment `
    -ResourceGroupName 'armcopydemo-rg' `
    -TemplateFile azuredeploy.json `
    -copyCount 5
As a challenge, add a parameter for the storage account name so you can use a different base name each time.
Deploying Multiple Virtual Machine Data Disks
The above examples make multiple copies of an entire resource. You can use the same logic and syntax to make multiples resources of different types, like virtual machines, virtual networks, and so on. However, you can also make multiple components of an individual resource using copy loops.
For example, you use the copy loop to create multiple virtual machine data disks. Data disks are attached to virtual machines and are separate from the operating system disk. The copy loop syntax is slightly different when working with a specific resource component. The copy block is now a list [] and not just an object.
Another difference is the copy loop’s name property. Previously, when copying an entire resource, the copy loop name didn’t matter. You could name the loop anything that made sense to you. However, for a resource component, the name field must be named the same as the property being copied.
Examine the code example below for multiple data disks. The copy loop name is “dataDisks” as you are making copies of the data disk for a virtual machine. The copy loop has a new property named input that contains the properties for the resource. In this example, the code sets the lun, disk name, how to create the disk, and disk size.
The data disk name is a concatenation of the string “web01-datadisk” followed by the copy loop index. This concatenation sets the disk name to web01-datadisk0, web01-datadisk2, and so on for the loop count.
"copy": [
    {
        "name": "dataDisks",
        "count": 3,
        "input": {
            "lun": "[copyIndex('dataDisks')]",
            "name": "[concat('web01-datadisk', copyIndex('dataDisks'))]",
            "createOption": "Empty",
            "diskSizeGB": 32
        }
    }
]
Here is the context of the data disk copy loop within an ARM template for deploying an Ubuntu virtual machine. The template has a parameter for how many data disks to deploy (dataDiskCount). The focus is to understand the data disk copy loop, so the virtual machine name, user name, password, virtual network, and subnet are hardcoded to specific values.
Lines 61 – 71 outlines the data disk copy loop.
Like the previous examples, you can use PowerShell with the ARM template’s dataDiskCount parameter for your deployment. This example deploys 2 data disks for the virtual machine.
Note: Virtual machine size SKUs have data disk limitations. The max supported data disks for Standard_B1s is two disks.
# Creates an Ubuntu virtual machine with 2 data disks
New-AzResourceGroupDeployment `
    -ResourceGroupName 'armcopydemo-rg' `
    -TemplateFile azuredeploy.json `
    -dataDiskCount 2

ARM Template Copy Summary
ARM template copy loops are a great way to reduce code length and reuse what you already have defined in the template. The syntax for copying an entire resource versus a resource component is different, particularly what you name the copy loop.
For full examples from the above tutorials, check out copyLoopExamples in my GitHub repository:
JeffBrownTech / Azure-ARM-Templates / copyLoopExamples
Want to learn more about Microsoft Azure? Check out more of my articles here!
References:
Microsoft Docs | Resource iteration in ARM templates