Accidentally deleting resources can cause some issues. Azure provides protection with resource lock, but remembering to enable this feature can be a burden. Luckily, you can use Azure Policy to audit and deploy resource lock to existing and new resources.
In this article, you will learn the basics of resource locks and Azure Policy. You will then follow a tutorial on creating a custom Azure Policy definition and assigning the definition to a subscription. The result will be resource groups having a do not delete resource lock associated with them.
What is a Resource Lock?
Resource locks prevent users from deleting or modifying Azure resources. The lock overrides any user’s permissions, so even owners cannot modify or delete the resource. There are two levels for resource locks.
- CanNotDelete: Users can read and modify a resource but cannot delete it.
- ReadOnly: Users can read a resource by not delete or update it. Similar to assigning users the Reader role.
You can apply resource locks to the management group, subscription, resource group, or individual resource. When you apply a lock at one of these parent scopes, all resources within the scope inherit the lock. For example, apply the lock at the resource group level if you want to protect all resources in a resource group. Each resource inherits the resource lock.
In general, you find resource locks by navigating to Settings > Locks on the resource. For example, here is a resource lock preventing deletion applied to a storage account.
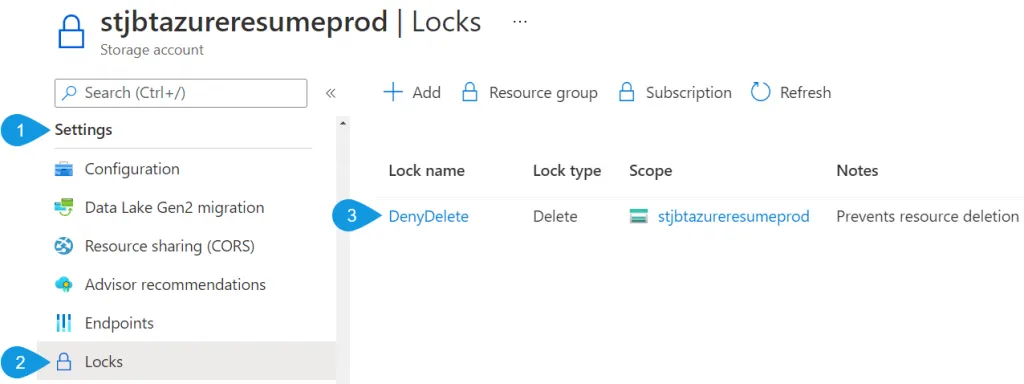
One thing to note is the delete lock type does not prevent users from modifying or deleting data in the storage account. Resource locks only protect against modifications or deletions of the resource itself. The same idea applies to other resources like databases. Read more about other considerations before using resource locks here.
What is Azure Policy?
Azure Policy is a service that enforces standards and resource consistency in the Azure tenant. You can bring resources to compliance through remediation or audit the resource settings. Some common use cases for Azure Policy include enforcing regulatory compliance, security settings, and cost management.
Azure Policy uses a JSON format to create the evaluation logic, which determines whether the resource is compliant. The policy definition includes metadata, conditions, and policy rules. The rules definition includes functions, parameters, logical operators, and conditions.
Some example policy definitions include:
- Enable Azure Monitor for VMs
- Flow logs should be configured and enabled for every network security group
- Configure Azure Defender to be enabled on SQL servers
Creating a Custom Azure Policy to Enforce Resource Lock
With the basics of resource locks and Azure Policy out of the way, let’s move on to creating a custom Azure Policy definition. The Azure Policy definition will look for resource groups, and if the resource group does not have a deny delete resource lock, the policy will create one.
To follow along with this tutorial, you will need:
- PowerShell 5.1 or higher with the Az PowerShell module installed. This tutorial uses PowerShell v7.1.4 and Az module v6.6.0.
- Access to an Azure tenant and subscription with Owner rights.
Step 1. Create an Azure Policy using JSON
To get started, create an empty JSON file named EnforceDoNotDeleteLock.json. This file contains information about the definition as well as the policy rule and action details. Below is the start of the definition. The full definition is enclosed in curly brackets { } followed by a properties block. The first properties you should define are the displayName and description of the policy.
The next property is mode. In general, you should set the mode to all as this mode evaluates against resource groups, subscriptions, and all resource types. Another option is indexed, which only evaluates resources types that support tags and location. Policy definitions created through the Azure portal are set to all.
The next section is metadata and stores information about the policy definition. You can define any properties and values that you might find helpful in tracking your custom policy definitions. This tutorial uses two metadata properties: the definition version and the category that determines how the Azure portal displays the definition.
Finally, you can define parameters. In this tutorial, the definition does not contain any parameters for passing in additional information, but the property is included if this changes in the future.
Here is the start of the custom Azure Policy definition:
{
    "properties": {
        "displayName": "Deploy CanNotDelete Resource Lock on Resource Groups",
        "description": "Creates a resource lock at the resource group level for preventing resource deletion.",
        "mode": "all",
        "metadata": {
            "version": "1.0.0",
            "category": "General"
        },
        "parameters": {},
        "policyRule": { ... }
}
Step 2. Create the Policy Rule
The next section in the policy definition is policyRule. This section consists of an if/then block that describes the conditions and actions. If one or more defined conditions are met, then the policy is enforced.
In this tutorial, the policy definition targets resource groups, so the if statement looks for resource types that equal Microsoft.Resources/subscriptions/resourceGroups. Here is the if statement:
"if": {
    "field": "type",
    "equals": "Microsoft.Resources/subscriptions/resourceGroups"
}
Next is the then statement, which has several properties. The first is effect, which describes what action the policy should take. In this case, the policy modifies an existing resource, so the effect is DeployIfNotExists. Read more about the available policy effects here.
Following the effect statement is the details section, which contains all the subproperties that define the related resources to match and the template deployment to execute. Here is a breakdown of the subproperties in the details section.
- Type: Defines the type of related resource to match, in this case, the
Microsoft.Authorization/locksresource. - ExistenceCondition: Tests to see if the resource already exists. Here the policy tests to see if an existing CanNotDelete resource lock exists on the resource group. If this condition evaluates to true, then the policy does not deploy the resource template.
- RoleDefinitionIds: This section defines the Azure RBAC role required to deploy the template. The default RBAC groups Owner and User Access Administrator groups have permissions to modify resource locks. This policy uses the GUID associated with the Owner RBAC group.
- Deployment: Contains the ARM JSON template code to deploy. The template deployment here creates a resource lock named DenyDelete with a lock level of CanNotDelete.
Here is the complete policy definition, including the then statement described above.
Step 3. Create the Custom Azure Policy Definition using PowerShell
With the policy file defined, it is time to create the policy. To make the policy definition:
- Open a PowerShell terminal and navigate to where the policy definition JSON file
EnforceDoNotDelete.jsonis located. - Connect to Azure using the
Connect-AzAccountcommand. - Use the
New-AzPolicyDefinitioncommand to create the policy. Specify-Name(DeployCanNotDeleteLock),-DisplayName, and-Policywith the path to the JSON file.
New-AzPolicyDefinition `
    -Name "DeployCanNotDeleteLock" `
    -DisplayName "Deploy CanNotDelete Resource Lock on Resource Groups" `
    -Policy .\EnforceDoNotDeleteLock.json
Step 4. Assign Definition to a Subscription
Finally, it’s time to assign the definition to a subscription. Assigning the definition to an entire subscription ensures that every existing and future resource group will have the lock enabled.
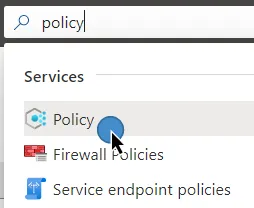
In the Azure portal, search for “policy” and select Policy from the results.
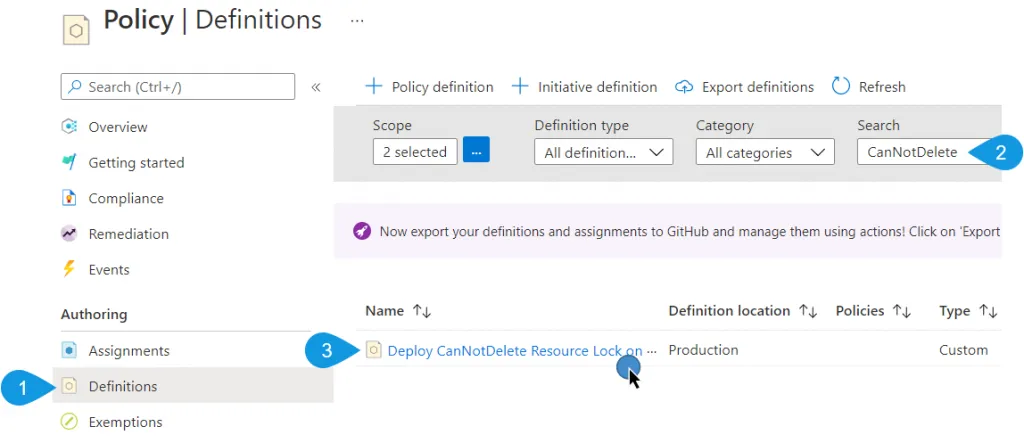
In Policy, navigate to Authoring > Definitions and search for “CanNotDelete.” Click on the matching policy name.
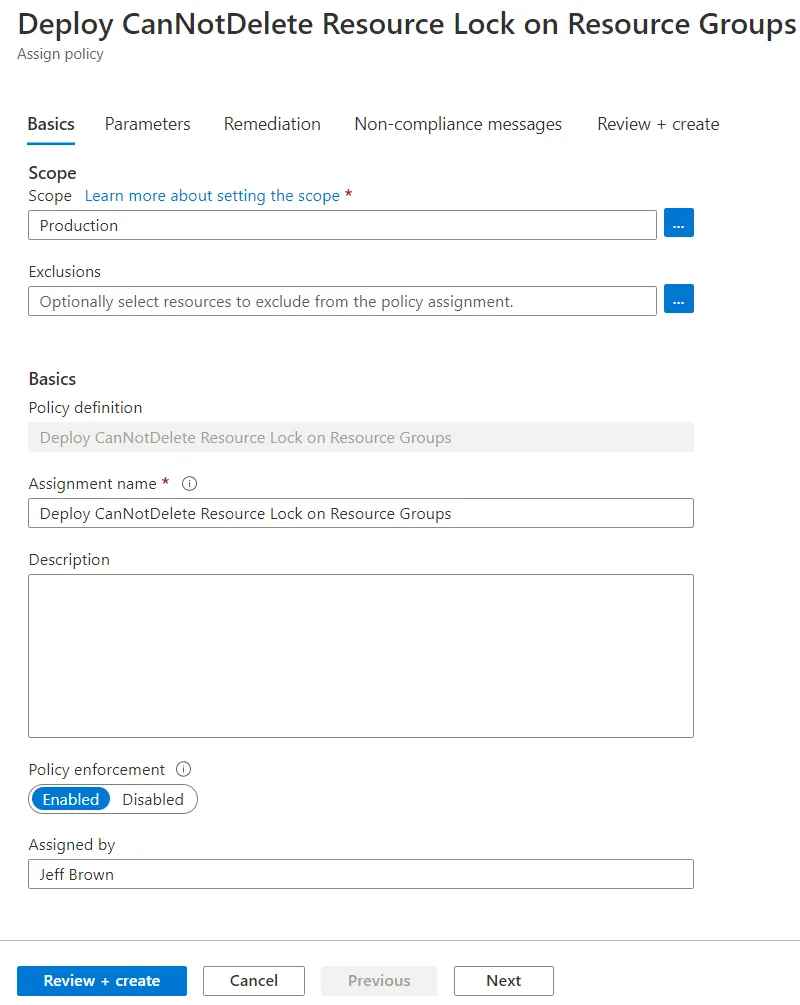
In the policy definition window, click on Assign. In the assign policy window, select the scope you want to apply the policy definition, such as an entire subscription. Ensure that Policy Enforcement is set to Enabled. Click Next.
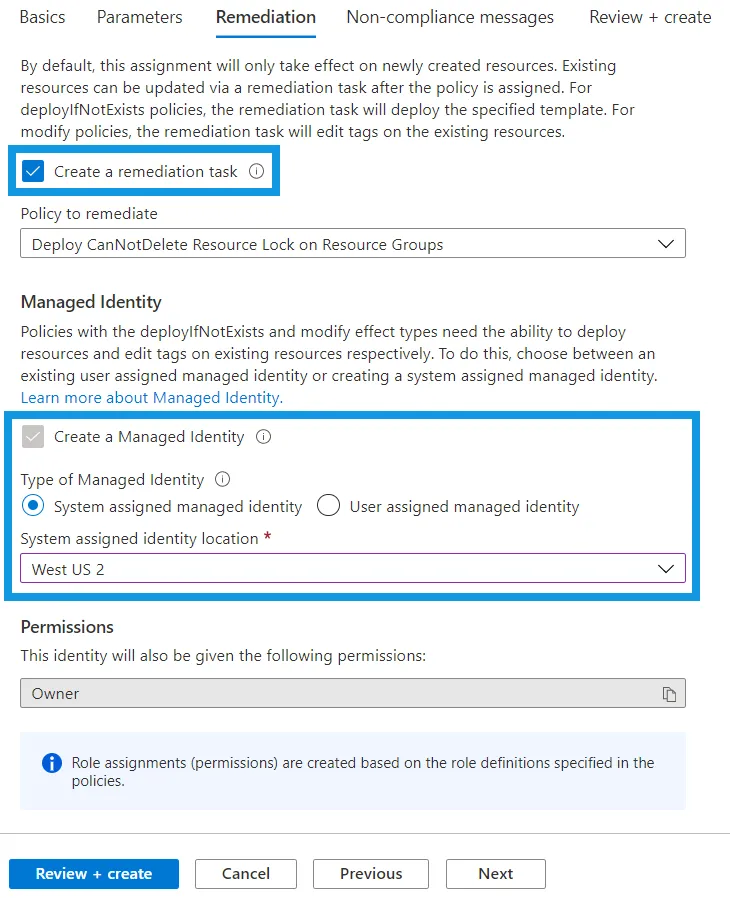
Since this policy definition does not have parameters, click Next to the Remediation tab. By default, the policy assignment only works on newly created resources. However, this subscription contains existing resources that Azure should remediate. To accomplish this, check the box for Create a remediation task.
Next, ensure the Create a Managed Identity is checked. The policy requires an identity with sufficient permissions to deploy the template as part of the remediation task. Choose a system or user-assigned managed identity and the identity location. The permissions should already be set to Owner, as you defined this earlier in the template. Click Next.
On the Non-compliance messages tab, enter in any message you’d like. This message displays to users when the resource is non-compliant. Click Review + create, then Create after validation has completed.
Navigate back to Policy > Authoring > Assignments. Here you should see the new policy assignment in the assignment list.

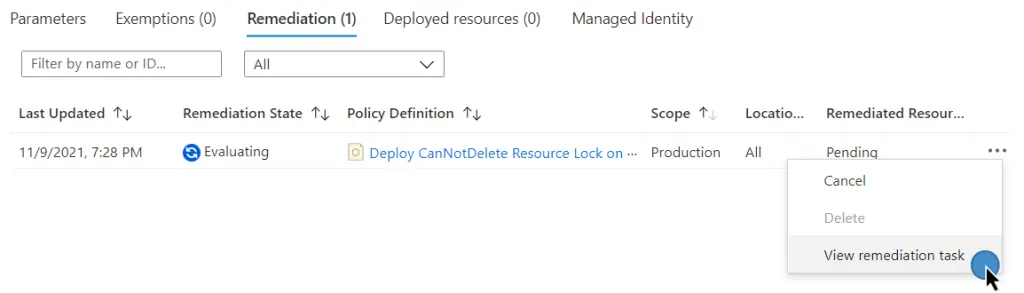
In the policy assignment window, select the Remediation tab. If any resources require remediation, this tab will display the task state. From here, select the three-dot context menu to the right and select View remediation task. This action displays any resources that match the policy definition and the state of its remediation. Once Azure completes the remediation, navigate to a resource group and resources in the subscription to verify the lock exists.

Summary
In this article, you learned how to use resource lock to prevent the modification or deletion of critical Azure resources. You then learned the basics of Azure Policy for enforcing organizational or compliance standards. Finally, you combined Azure Policy and resource lock to enforce a CanNotDelete policy on all resource groups in a subscription.
With this new knowledge, what other kinds of tasks do you think you can use Azure Policy to enforce?
Enjoyed this article? Check out more of my Azure content here!
