PowerShell is a fantastic tool for creating repeatable processes. You might need to create, modify, or delete objects in your environment, such as user accounts, virtual machines, or mailboxes. You can accomplish this by placing the data in a CSV file and using the PowerShell foreach statement to iterate through these objects.
This tutorial will teach you to import content from a CSV file and access the data. Next, you will learn about the foreach statement’s syntax to take repeatable actions on a collection of items. Finally, you’ll see a real-world example of creating multiple Azure AD user accounts by importing data from a CSV file and using the foreach statement to create the accounts.
Importing Content from CSV Files
CSV (or Comma-Separated Values) files contain rows of information where a comma separates each column. Here is an example CSV file with employee information. The file includes their first name, last name, and department name.
Note that the first line is the column header, which is not required. Save this data to a file named user_data.csv.
FirstName,LastName,Departement
"Jeff","Brown","Information Technology"
"Maggie","Smith","Accounting"
"Stacey","Fullbright","Legal"
"Mike","Simpson","Human Resources"
You can import the file contents using the Import-Csv command. Use the Path parameter to indicate the CSV file path to import. In the example below, .\user_data.csv means the file is in the current directory.
Import-Csv -Path .\user_data.csv
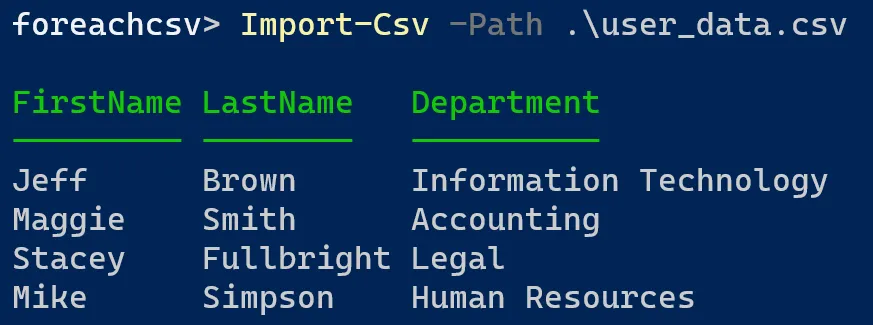
As you can see in the screenshot above, PowerShell imported the data and displayed the contents using the first line as the column headers. Each row’s content lines up with that column’s data.
CSV files without headers
In the example above, PowerShell used the first line in the CSV as the column headers. If your CSV file does not contain headers in the first line, you can specify headers during the import process.
Here is an updated user_data.csv file without column headers.
"Jeff","Brown","Information Technology"
"Maggie","Smith","Accounting"
"Stacey","Fullbright","Legal"
"Mike","Simpson","Human Resources"
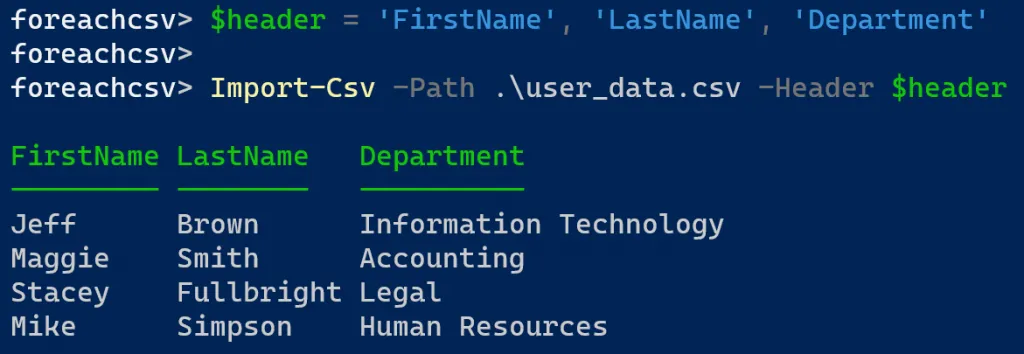
First, created a variable named $header that contains a comma-separated list with each column header in single quotes.
$header = 'FirstName', 'LastName', 'Department'
Next, use the Import-Csv command again and use the same Path value (.\user_data.csv). Use the Header parameter with the $header variable created in the previous step.
Import-Csv -Path .\user_data.csv -Header $header
Different delimiters
The Import-Csv command assumes commas separate each property. However, you may encounter a file with a different delimiter or character used to separate the values. Luckily, Import-Csv can handle this!
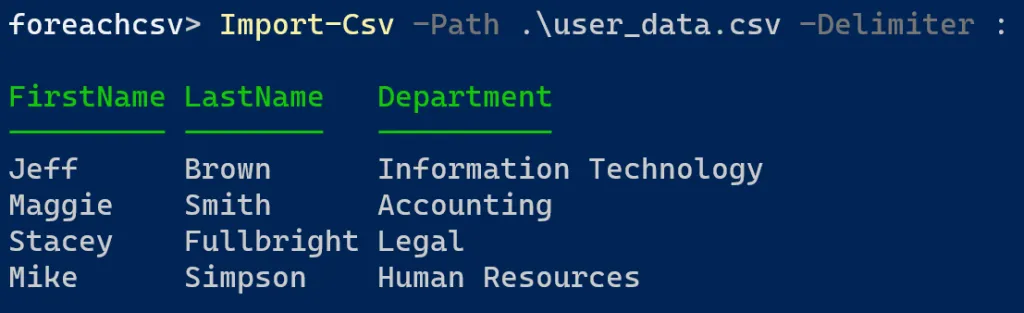
Here is the user_data.csv file using colons ( : ) as the delimiter instead of commas. The header columns have also returned.
FirstName:LastName:Department
"Jeff":"Brown":"Information Technology"
"Maggie":"Smith":"Accounting"
"Stacey":"Fullbright":"Legal"
"Mike":"Simpson":"Human Resources"
Use the Delimiter parameter and specify the delimiter type, in this case, the colon ( : ). PowerShell interprets the data file and correctly displays the contents based on this alternative delimiter.
Import-Csv -Path .\user_data.csv -Delimiter :
PowerShell custom objects
So far, the examples above have imported the content and displayed it on the screen. The power of Import-Csv comes with creating custom objects to work with the data. When importing a CSV file, save the contents to a variable, and PowerShell automatically creates a custom object.
Learn all about hashtables and PSCustomObjects in PowerShell Hash Table vs. PSCustomObject: Deep Dive & Comparison.
Here’s the Import-Csv command that saves the imported data to a variable named $userData. This example uses the original user_data.csv file with a comma as the delimiter and a column header.
After PowerShell imports the data, pipe the $userData variable to Get-Member. Note how the column headers are now members or properties of the custom object.
$userData = Import-Csv -Path .\user_data.csv
$userData | Get-Member

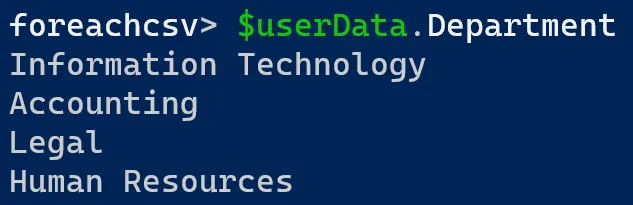
You can now use built-in properties and methods on the custom object. For example, you can view all the departments by accessing the Department property of the $userData variable.
You can also perform searches with the custom object. For example, list all the records where Department equals Accounting.

Reviewing ForEach Loops
The foreach statement (or foreach loop) allows you to iterate or loop through a series of values in a collection. The most common example is looping through items in an array. In the examples later, you will import a list of items from a CSV file with one or more properties.
The syntax for the foreach loop starts with the foreach keyword. Next, in parentheses, you create a variable representing individual items in the collection. Each time the loop executes, PowerShell sets the value to the current item in the collection. Finally, the actions you want to perform on each item in the collection are contained in curly brackets { }.
Here is the basic structure of a foreach loop. The variable $item represents the current item in the $collection.
foreach ($item in $collection) {
    # additional commands
}
Typically, you define the collection of items before the foreach loop. However, the variable designated for the current item is defined only in the foreach loop definition.
While not required, most often you’ll see the current item variable name as the singular version of the items in the collection (or some variation). Review the examples below for ideas on what this looks like.
# A collection of numbers
$numbers = @(0, 1, 1, 2, 3, 5, 8, 13, 21, 34, 55, 89, 144)
foreach ($number in $numbers) { ... }
# A collection of names
$names = @('John', 'Rebecca', 'Patrick', 'June')
foreach ($name in $names) { ... }
# A collection of processes
$processes = @('lsass.exe', 'chrome.exe', 'explorer.exe')
foreach ($process in $processes) { ... }
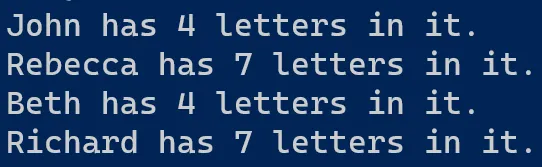
Finally, you take action on the current item by referencing the iterator variable name you defined in the foreach statement. In the example below, the iterator is $name, and the foreach statement loops through the list of names and outputs the string length.
$names = @('John', 'Rebecca', 'Beth', 'Richard')
foreach ($name in $names) {
    "$name has $($name.Length) letters in it."
}
Combining PowerShell ForEach and CSV Files
Let’s return to where you imported data from the user_data.csv file into the $userData variable. Unlike the previous foreach examples, each item in the collection now has multiple members (FirstName, LastName, Department). You can access these members by appending the member name to the foreach loop iterator. In the example below, the foreach loop iterator is $user.
Note: When accessing member values in an object, you must first enclose it in a subexpression. This is why each member (e.g., $user.FirstName) is surrounded by $( ). You can read more about double-quoting rules here.
foreach ($user in $userData) {
    "$($user.FirstName) $($user.LastName) works in the $($user.Department) department."
}
Alternatively, you can save each item’s members to variables like this:
foreach ($user in $userData) {
    $firstName = $user.FirstName
    $lastName = $user.LastName
    $department = $user.Department
    "$firstName $lastName works in the $department department."
}
Either way, the output should produce the following sentences:

Creating New Azure AD Users Example
If you review the CSV file from earlier (user_data.csv), this file would be great for creating new users in your organization. Let’s review an example script below called New-UserAccount.ps1 and use PowerShell foreach and the CSV file to create new users.
Connect to Azure AD
Use the Connect-MgGraph cmdlet to connect to Azure AD using the Microsoft.Graph PowerShell module. If you are logging in interactively, you must specify the scopes you require during the session. You can read more about using Microsoft Graph PowerShell here.
$scopes = "DeviceManagementApps.ReadWrite.All,DeviceManagementConfiguration.ReadWrite.All,DeviceManagementManagedDevices.ReadWrite.All,DeviceManagementServiceConfig.ReadWrite.All,Directory.ReadWrite.All,User.ReadWrite.All"
Connect-MgGraph -Scopes $scopes
Import file and create foreach loop
First, create the beginnings of the script with the information you’ve learned so far. Import the CSV file into a variable named $userData. Next, create a foreach loop using $user as the loop iterator variable.
$userData = Import-Csv -Path .\user_data.csv
foreach ($user in $userData) {
    # Create user here
}
Create password profile
Next, in the foreach loop, add the logic to create a random password for the initial user account creation. In this script, create a random number using the Get-Random cmdlet with a Minimum value (100000000) and a Maximum value (999999999). Save this to a variable named $randomNum.
Next, create a hashtable name $passwordProfile. In the hashtable, create a key named Password with a value of Changeme$randomNum. Create another key named ForceChangePasswordNextSignIn with a value of $true. This second key forces users to change their password on the first sign-in.
$randomNum = Get-Random -Minimum 100000000 -Maximum 999999999
$passwordProfile = @{
    Password                      = "Changeme$randomNum"
    ForceChangePasswordNextSignIn = $true
}
Define user account properties
Next, create a hashtable named $newUserParams. You will use this hashtable for splatting the parameter values to the new user cmdlet coming up next. Add the following key/value pairs to the hashtable.
Learn all about splatting in PowerShell Splatting: Introduction & Demo.
- DisplayName = $displayName
- GivenName = $user.FirstName
- Surname = $user.LastName
- MailNickname = $mailNickname
- UserPrincipalName = “$mailNickname@upstarttech.com”
- PasswordProfile = $passwordProfile
- Department = $user.Department
- AccountEnabled = $true
$newUserParams = @{
    DisplayName       = $displayName
    GivenName         = $user.FirstName
    Surname           = $user.LastName
    MailNickname      = $mailNickname
    UserPrincipalName = "$mailNickname@upstarttech.com"
    PasswordProfile   = $passwordProfile
    Department        = $user.Department
    AccountEnabled    = $true
}
Create user account
Finally, use the New-MgUser cmdlet to create the user and pass the hashtable $newUserParams.
New-MgUser @newUserParams
Finally, at the end of the script and outside the foreach loop, add the Disconnect-MgGraph cmdlet to disconnect your session.
Here is the full script for reference:
$scopes = "DeviceManagementApps.ReadWrite.All,DeviceManagementConfiguration.ReadWrite.All,DeviceManagementManagedDevices.ReadWrite.All,DeviceManagementServiceConfig.ReadWrite.All,Directory.ReadWrite.All,User.ReadWrite.All"
Connect-MgGraph -Scopes $scopes
$userData = Import-Csv -Path .\user_data.csv
foreach ($user in $userData) {
    $randomNum = Get-Random -Minimum 100000000 -Maximum 999999999
    $passwordProfile = @{
        Password                      = "Changeme$randomNum"
        ForceChangePasswordNextSignIn = $true
    }
    $mailNickname = "$($user.FirstName).$($user.LastName)"
    $displayName = "$($user.FirstName) $($user.LastName)"
    $newUserParams = @{
        DisplayName       = $displayName
        GivenName         = $user.FirstName
        Surname           = $user.LastName
        MailNickname      = $mailNickname
        UserPrincipalName = "$mailNickname@upstarttech.com"
        PasswordProfile   = $passwordProfile
        Department        = $user.Department
        AccountEnabled    = $true
    }
    New-MgUser @newUserParams
}
Disconnect-MgGraph
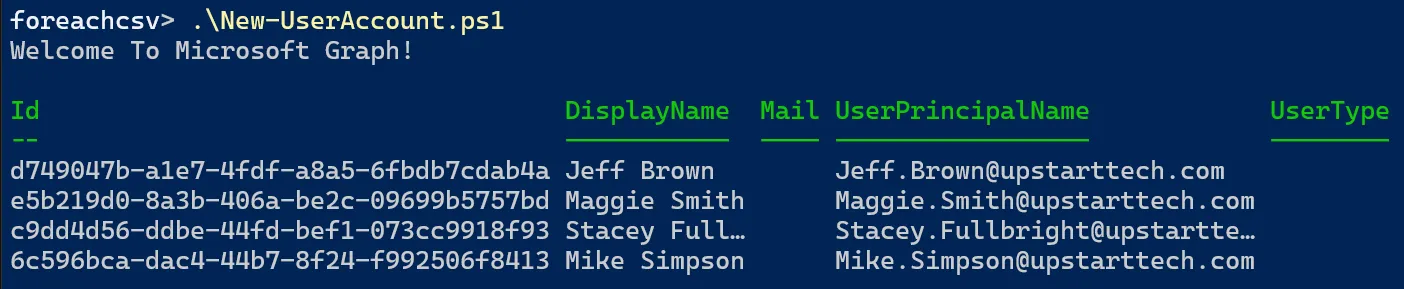
The script output shows PowerShell creating the four users from the CSV data file.
PowerShell ForEach CSV File Summary
In this tutorial, you learned how to PowerShell to import data from a CSV and loop through the contents using a foreach loop. You then reviewed a user account creation script where you imported new user information from a CSV file, then looped through it to create the accounts.
There are some improvements you can make to the New-UserAccount.ps1 script. First, see if you can add a parameter to pass a CSV file path, so you don’t have to modify the Import-Csv command. Second, find a way to export the new user’s password to you can provide it to them on their first day. Good luck!